
Moving into a new build house is very much like having a completely blank canvas to work with. All the rooms are just plain white or beige, with no life or character. As some of you may know from my posts here, I love anything to do with sprucing up my home. This is where DIY wood panelling can make such a difference to your rooms.
Everyone in my family has their own room, the kids each have their own little havens, my husband has his own office and I have the kitchen, which is not my own as it’s always invaded with hungry little people demanding snacks and food.
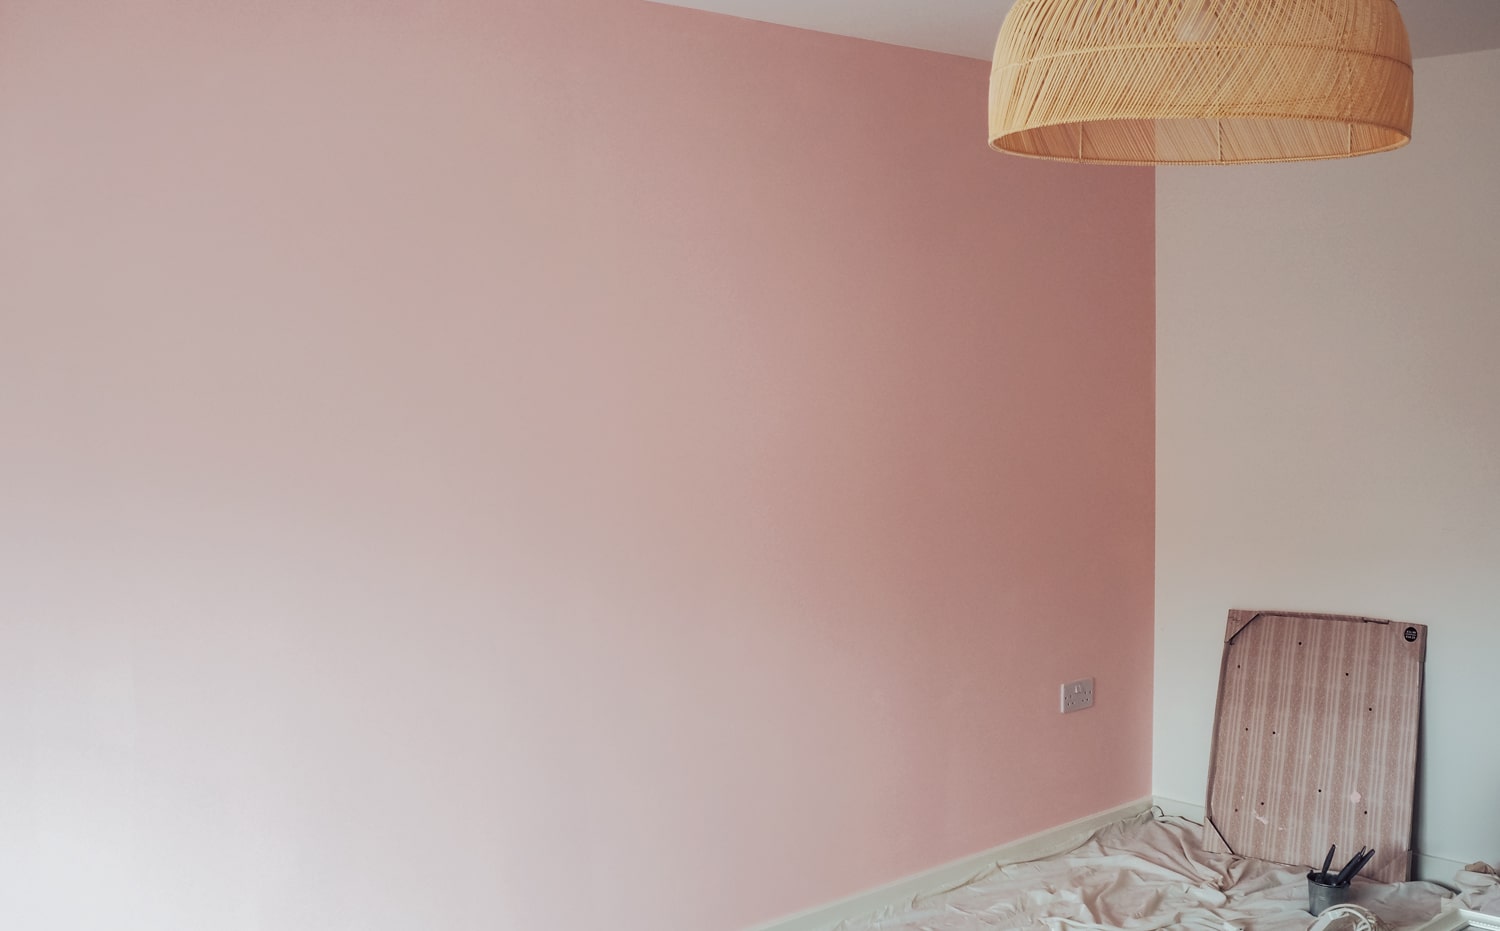
Before we moved in my husband agreed to me having the lounge as my own space, in fact he insisted on it. So I got straight to ordering a new sofa in turquoise velvet with a nice pink velvet footstool , which will all look perfect against the contrast of the light grey carpet.
As of writing this we are still waiting for our sofa and footstool to arrive, so in anticipation of this I have got on to making this room my own, starting with a feature wall made up of wood panelling.

I have seen a couple of posts online on how to do DIY wood panelling, but from the posts I’ve seen, people have done this on bedroom walls and nothing as wide as our lounge wall which is 5.3m wide.
So we set about getting everything we need in order to do this. If you are looking to follow along and try some wood panelling yourself, this is the complete list of materials we used. Just as a fyi it would seem the average ceiling height for newer houses is anywhere between 210cm – 240cm, in our lounge it was approximately 228cm.
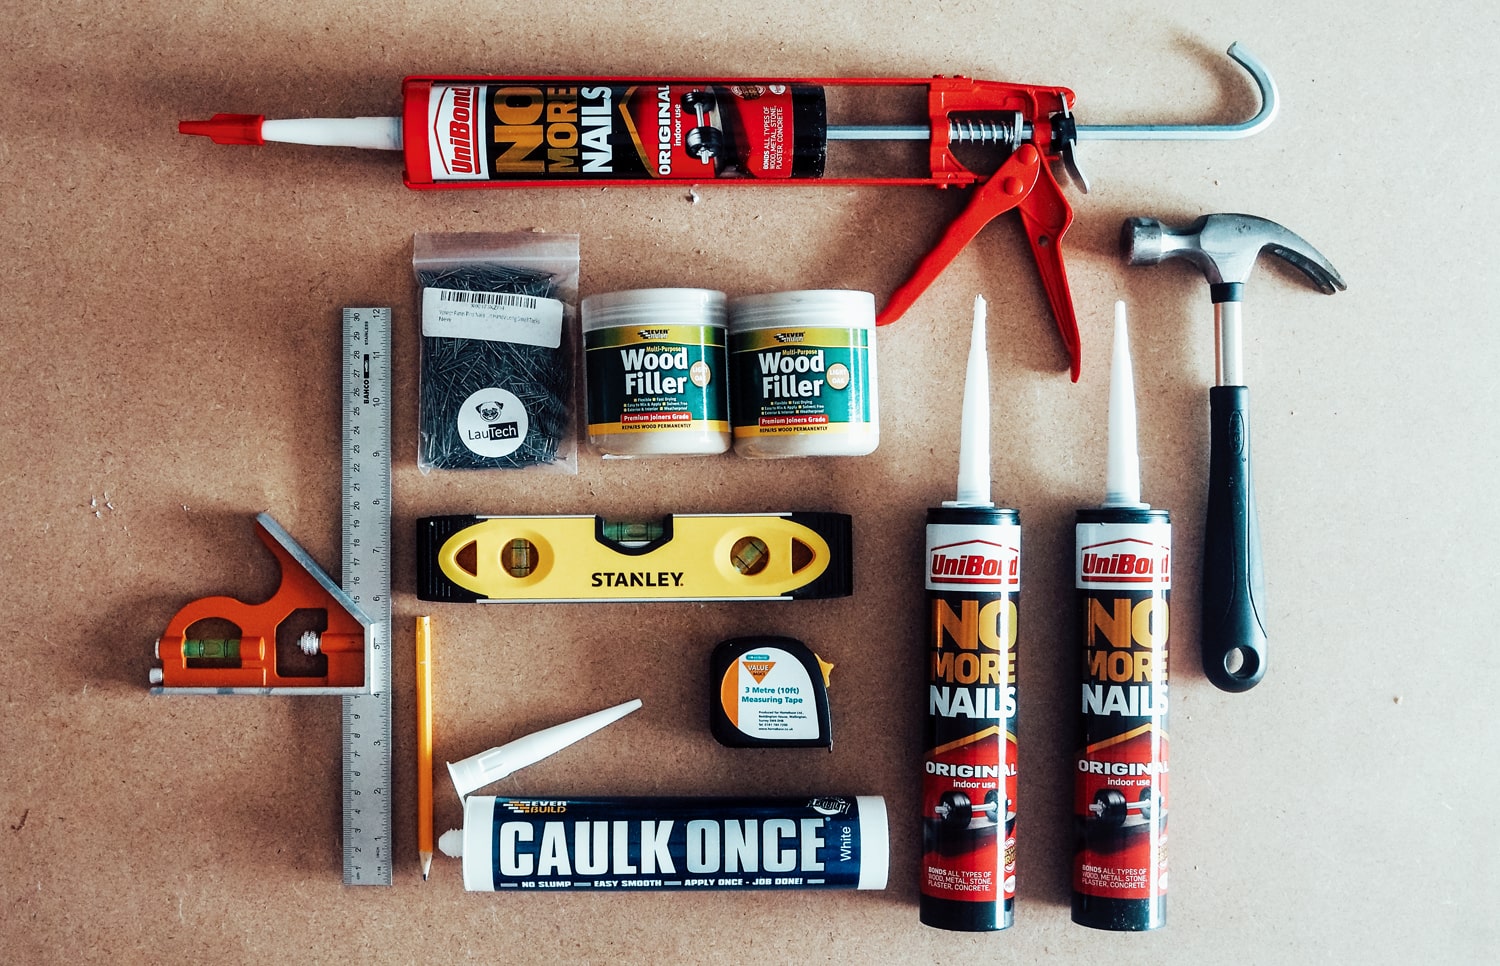
Materials for wood panelling:
- MDF Panels – this will all depend on a couple of factors; your car size and your ceiling height.
If you are reading this then chances are you are an occasional DIYer like us, so I would recommend either B&Q or Jewson’s to pick up your panels from (Jewson’s are more expensive). The reason I recommend these 2 shops is because from our extensive research, these are the only 2 places you can walk up, buy your boards and they will cut them for you. Although due to the current Covid climate, B&Q will only offer a maximum of 4 cuts per customer (usually they offer the first 15 free then 50p per cut after). You want 9mm thick boards as this will give you the best panelling effect, 6mm is too thin and 12mm is too thick. So you really only have 2 options, first option and this is the best option is to go for the 2.44m x 1.22m x 9mm (this option will be dependent on the size of your car). However, unless you have a van, you will need to make sure that on the day you go to pick up your boards the cutting machine is working. For our lounge 2 x MDF boards at 2.44m x 1.22m x 9mm would have been enough, so with 2 boards and 4 cuts, we would have been left with 6 pieces of MDF which were approximately 2.44m x 0.4m x 9mm. We had a nightmare with our local B&Q which resulted is us needing to go with option 2 as each time we went we phoned up to be told the cutting machine was working, only to get there and find it was out of order! So we went with option 2, 5 x MDF boards 1.83m x 0.61m x 9mm. This is the more expensive option of the 2, so if you can, go with option 1 as for 2 x 2.44m boards it would have been £31, for 5 x 1.83m boards it was £59. - Strong Adhesive – we used 5 and a half tubes of No More Nails which comes in either single tube or a 3 tube pack.
- Caulking Gun – you will need this to go with the adhesive, I used this cheap one.
- Tack Nails – to keep the panels in place while the adhesive set. I bought a pack of these as I plan to do more projects using these.
- Wood Filler – to fill in any gaps (which there definitely will be if you are not a professional like we aren’t)! I used this one.
- Caulk – this one is entirely optional. I used some around the entire edge as there were some gaps because our walls are slightly uneven, so if this doesn’t bother you then there is no need to use this.
- Paint – I chose 5L of Valspar Budding Beauty., but I can fully appreciate that pink will not being everyone’s first choice!
Tools we used:
- Measuring tape (required)
- Pencil (required)
- Spirit level (required)
- Hammer (required)
- Combination square (not necessary but is really helpful, this is what I have)
- Mitre saw (not necessary but if you have one then definitely use it instead of a hand saw, this is what I have)
- Quick clamps (not necessary but if you end up using a mitre saw, use these for the stacking the horizontal pieces of wood as it will guarantee each piece is the same length)
- Circular saw (not necessary but if you are unlucky enough like us that your local B&Q timber saw is out of order, this will be a life saver)

Steps
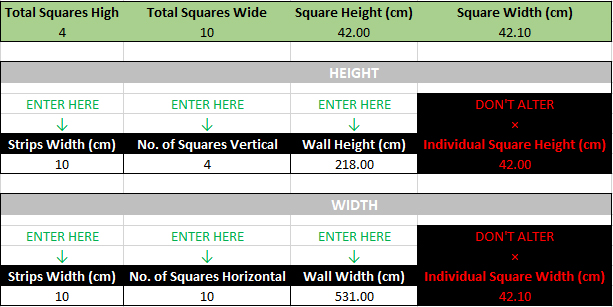
Step 1. The first thing you will need to do is work out your measurements. This is the most important step as if you get it wrong at the start it will result in completely uneven squares. You don’t have to go with squares, rectangles work just as well and you will use less wood.
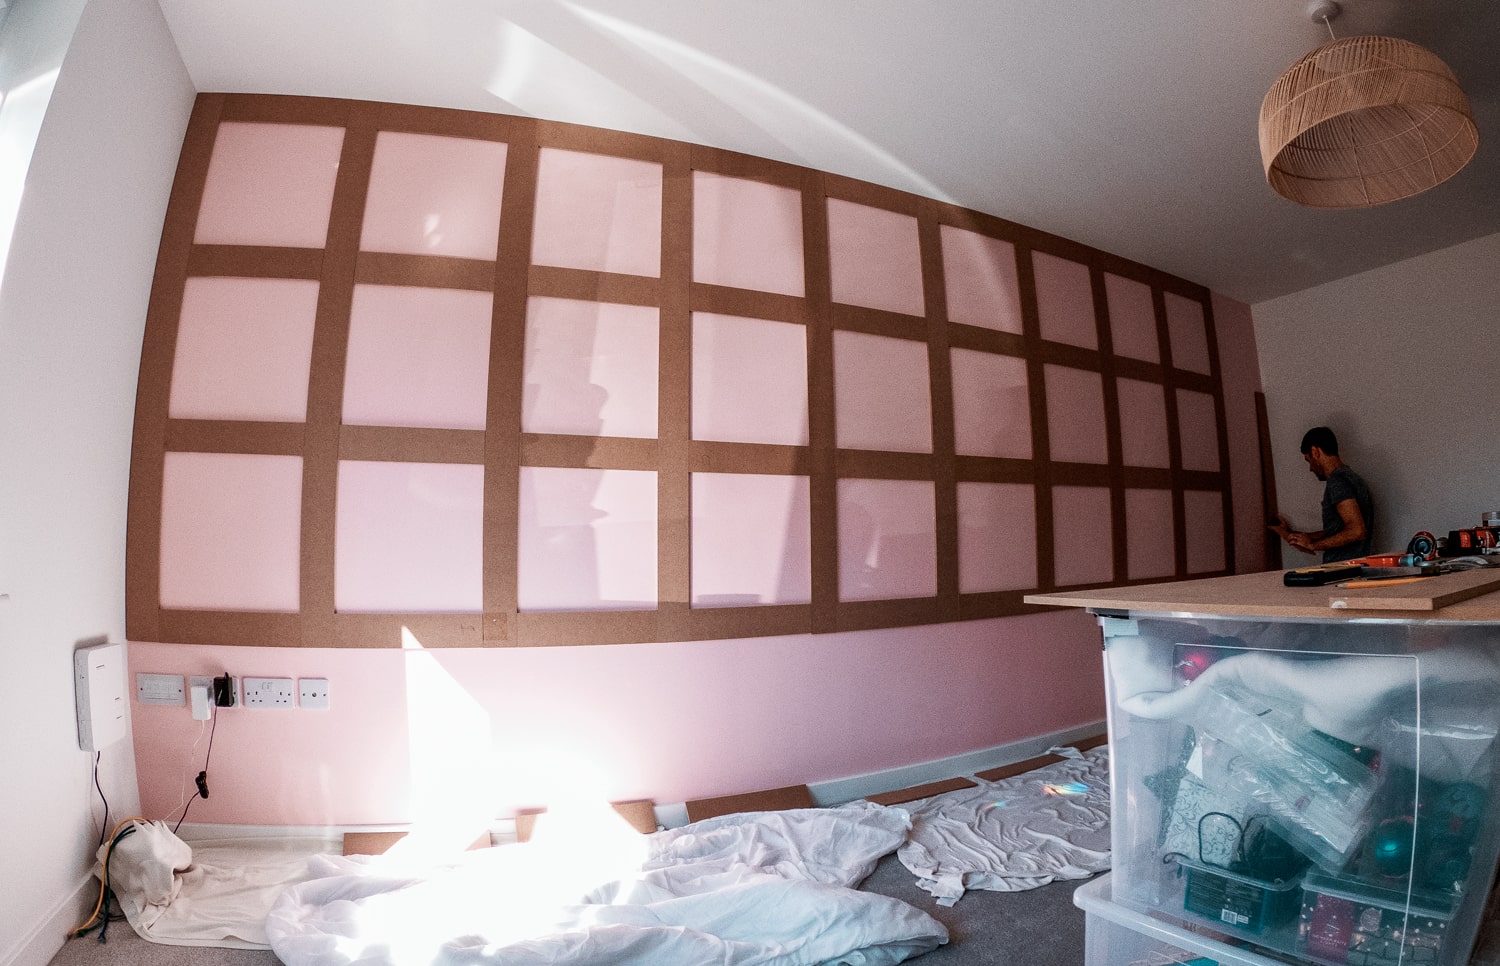
But if you want to go with squares, you will need to measure your wall first. We knew we wanted to go with 4 squares high, so this made things easier to work out. I should also point out here that we added strips top to bottom, left to right, including a piece just above the skirting board as we didn’t want to paint that.
Some people choose not to add a piece above the skirting board, so decide now which you want. For the purposes of this post, everything I show you includes having a piece above the skirting board. So for measurements, make sure you measure from the top of the skirting board to the ceiling.
For our DIY wood panelling we knew we would be going with 10cm wide strips, so again work out before you take the measurements what you will be going with.
Our ceiling height was approximately 228cm, minus the skirting board, left us with 218cm. This meant with 4 squares high, we would have 5 horizontal rows of wood. So we took off 50cm (5 strips of wood each at 10cm width) from 218cm which left us with 168cm.
Divide what you are left with by 4, in our case it was 168cm divided by 4 which left us with our squares being 42cm high. Our lounge width was 531cm, so I cut a piece of paper by 42cm x 42cm to see how many squares I would need. It worked out to 10 squares wide with each square being 42.1cm wide, so almost the perfect square.
To make it easy for you I have put together a handy calculation sheet where if you enter the width of the strips you want (for us we went with 10cm), enter the approximate amount of squares you want width and height, enter your wall dimensions and it will work out your individual square height and width for you for your wood panelling.
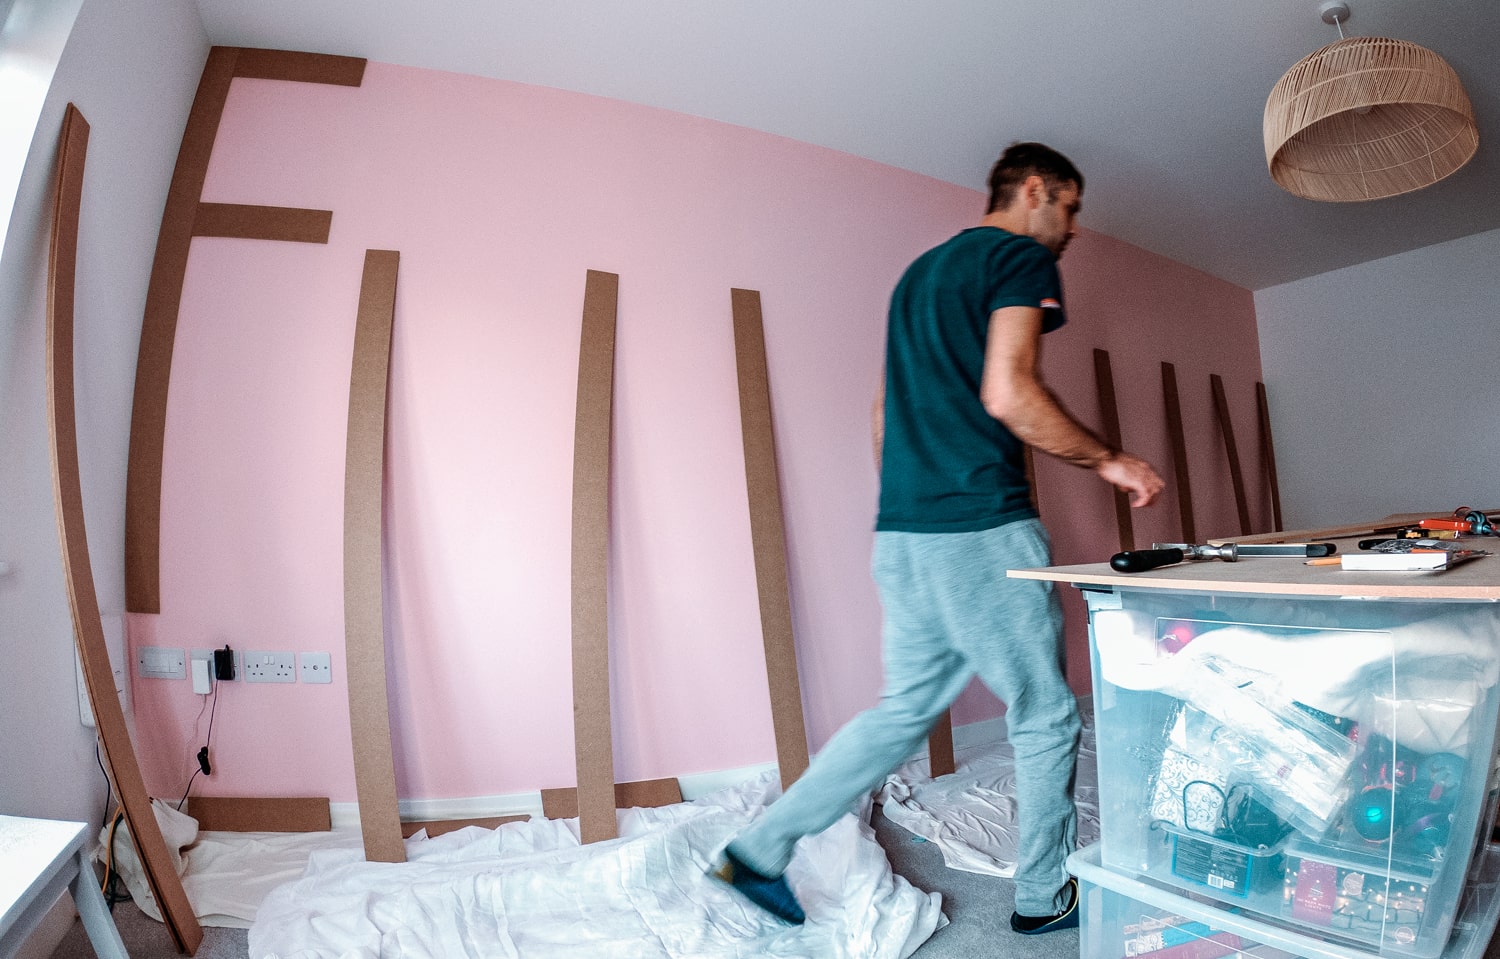
Step 2. Depending on what you managed to get from your local hardware shop, you will either be left with perfectly cut strips in your desired width, or you will need to do it yourself, like we unfortunately had to.
If you go with the latter and are fortunate enough to own a circular saw, I would highly recommend using it as it will take ages to cut all of the pieces by hand and if you plan to add wood panelling in any other rooms, it will come in very handy.
I cut all of the vertical strips to start with, measuring each one. But for the horizontal strips I roughly cut them to size and then clamped 5 pieces together and cut them all to the same size.
When you cut individually you will end up with minor differences, so if you clamp pieces together you are guaranteeing each piece will be the same. For this part I used a mitre saw for each cut as it saved A LOT of time.
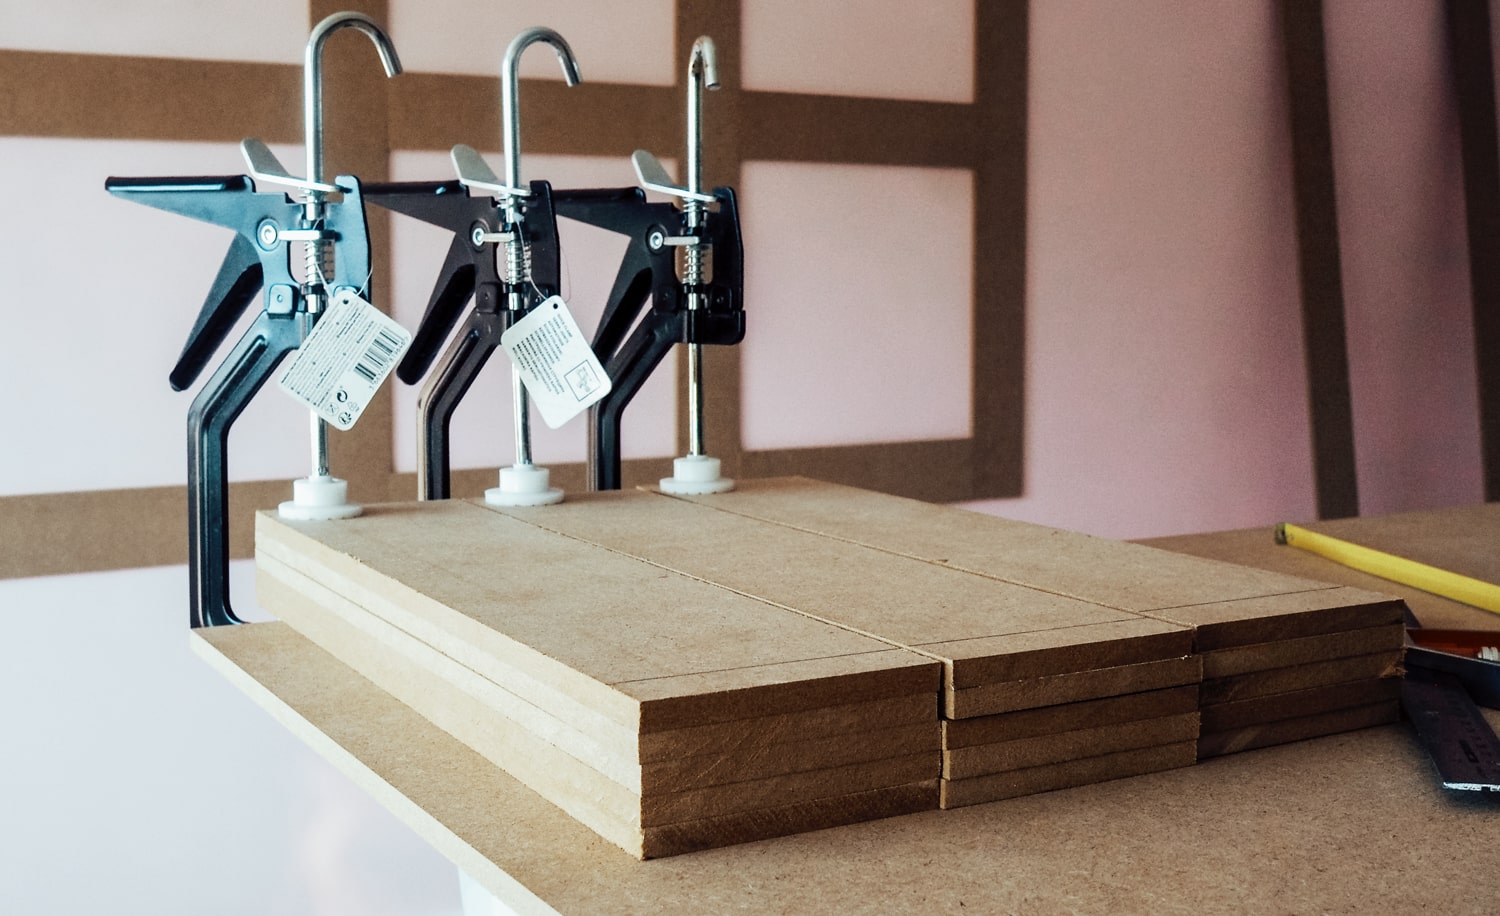
My top tip for this stage is to leave the last column of horizontal strips, cut them once you have stuck all other columns to the wall.
If your calculations are slightly out, then you can use the last column to hide the few millimetres you may be out by. Even if your squares are slightly out by a few millimetres, the overall look of the DIY wood panelling won’t be noticeable.
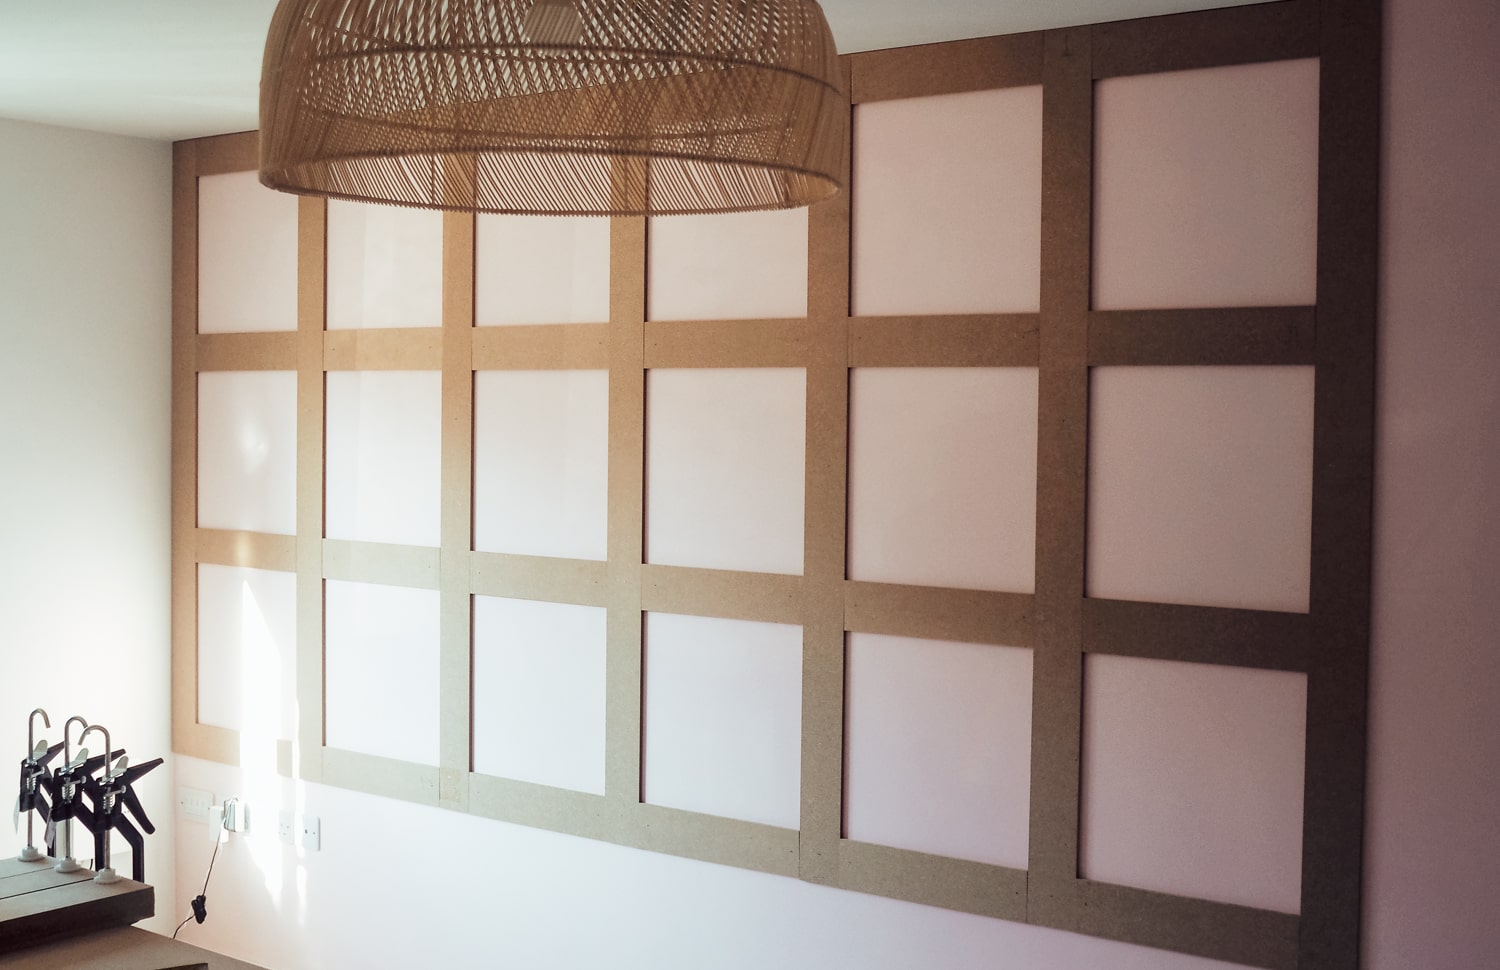
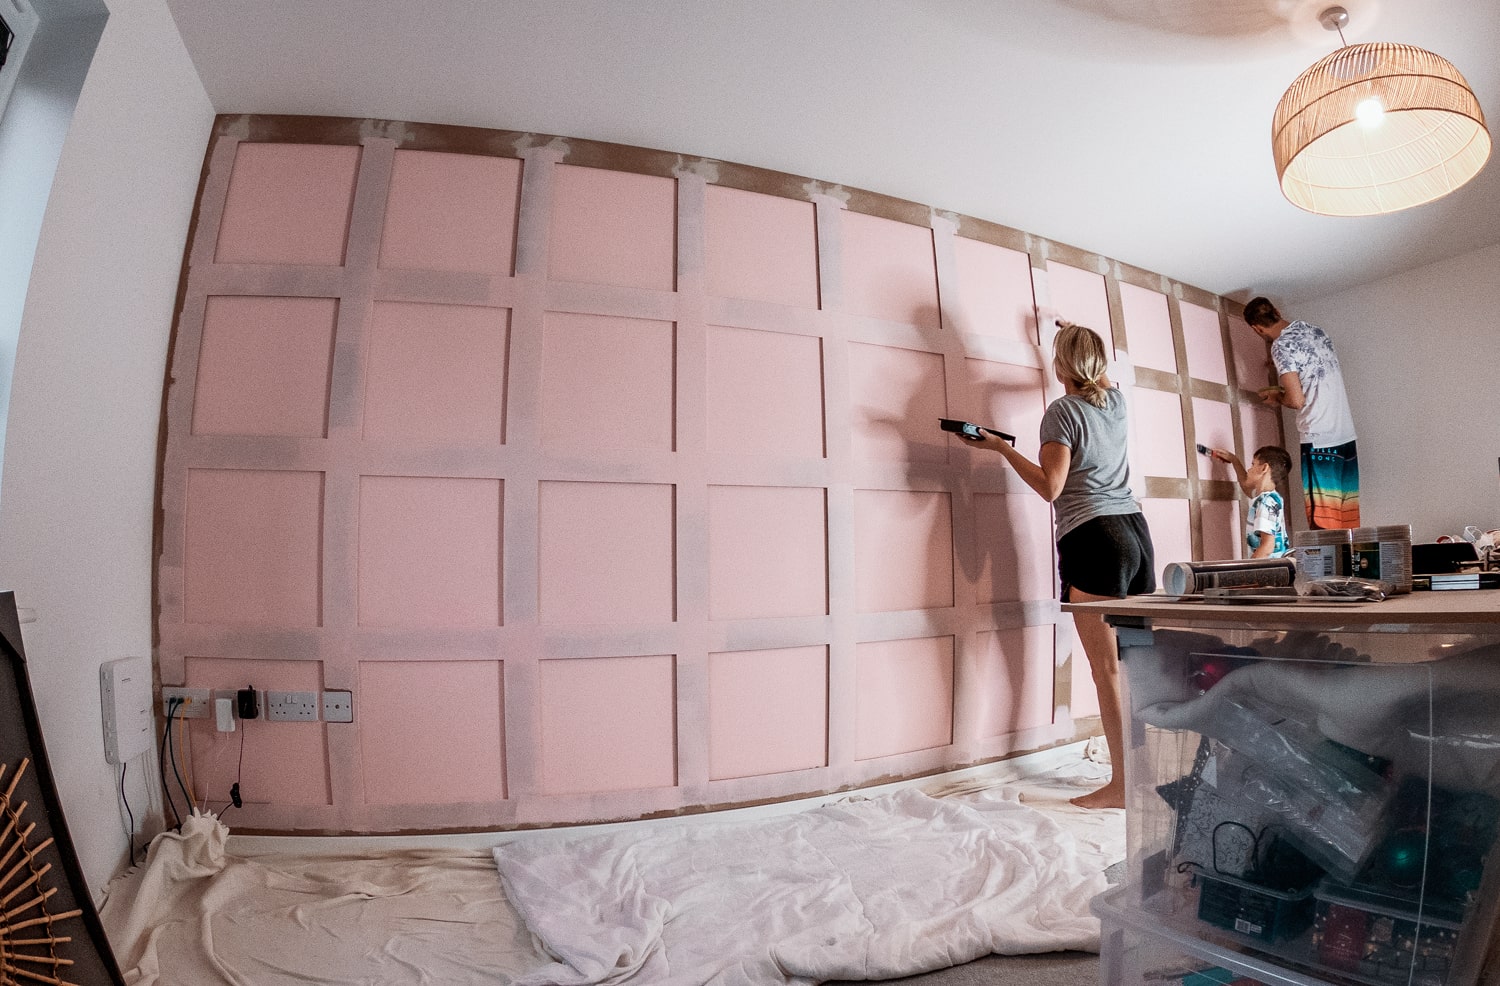
Step 3. Now you have all of your cuts, its’ time to get sticking. Most people layout the outer frame first (top, bottom and sides plus vertical columns).
But we found it easier to work from left to right, 1 column at a time. The reason for this is that you may find your horizontal strips a bit of a squeeze to get in if you have the 2 outer vertical strips already in.
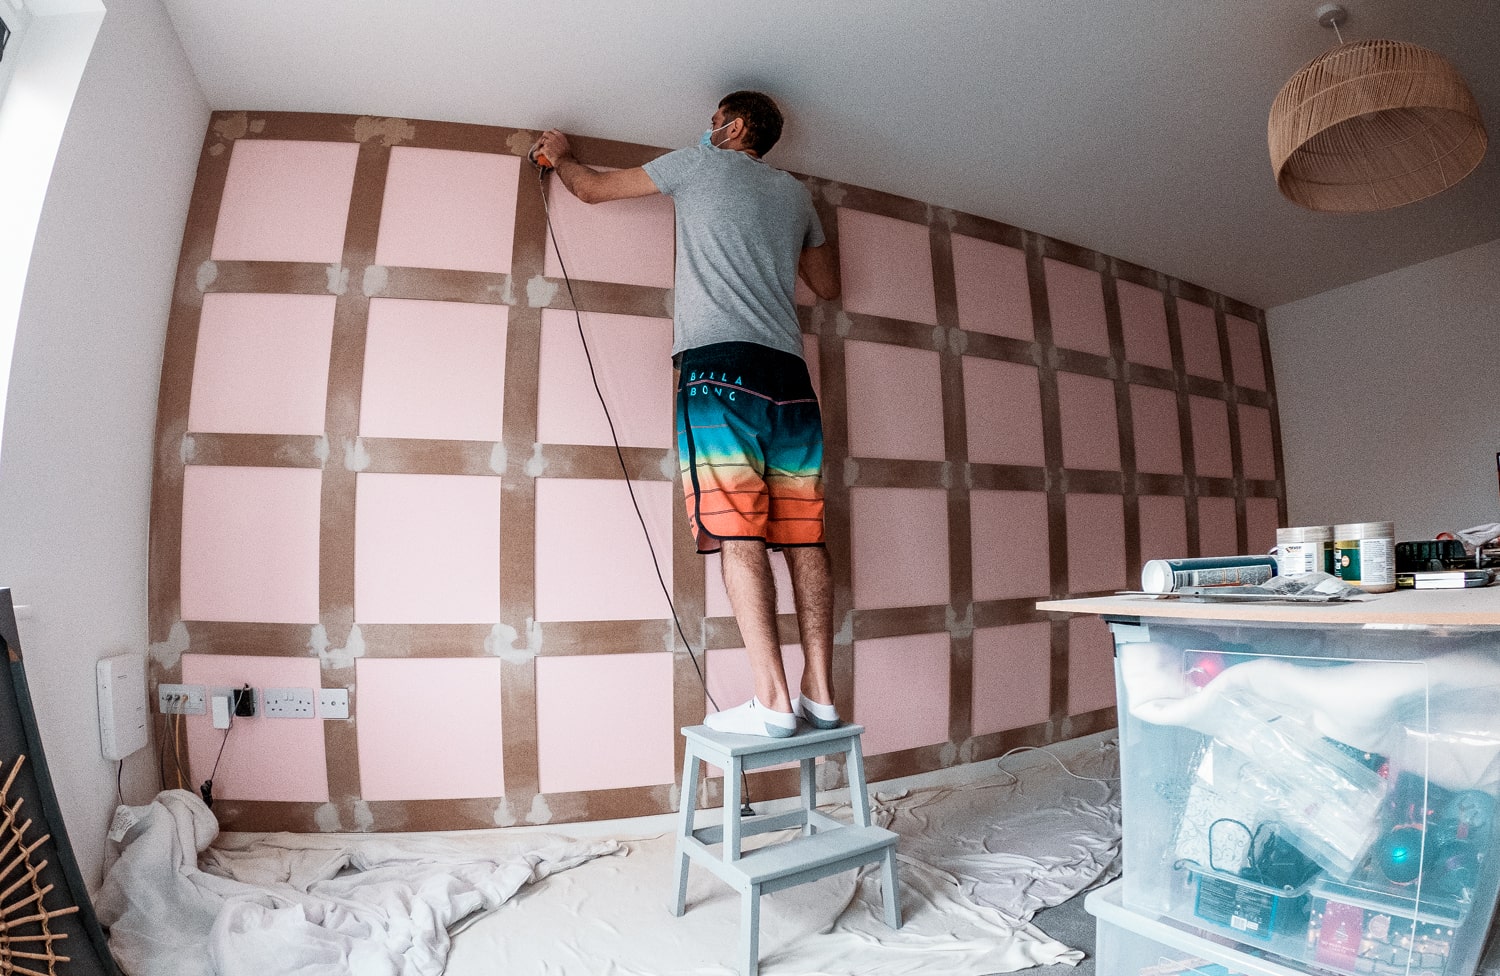
Starting with your first vertical strip, stick it down with a generous amount of adhesive. Once stuck, nail a tack nail in the top, middle and bottom, but leave enough of the head sticking out so they are easy to remove once the adhesive is set.
Then stick down all of your horizontal battens for the first column. Once you stick your horizontal battens to the wall add a tack nail to the far left and far right of the batten. Use your spirit level to make sure each strip is level.
What I did here is once I had the first 2 horizontal strips in I used a piece of off cut mdf and cut it to the exact size of the space of the height in the first square, I then used that as my spacer for the rest of the squares.
This will save you so much time for repeating the process across the rest of the wall.

Step 4. Once all of your strips are stuck to the wall, leave to set, usually overnight is more than enough time.
Step 5. Now this step is completely optional but Alex is a complete DIY novice so some of his joins were quite noticeable. He is very much a perfectionist so he wanted the wood panelling to at least look consistent.
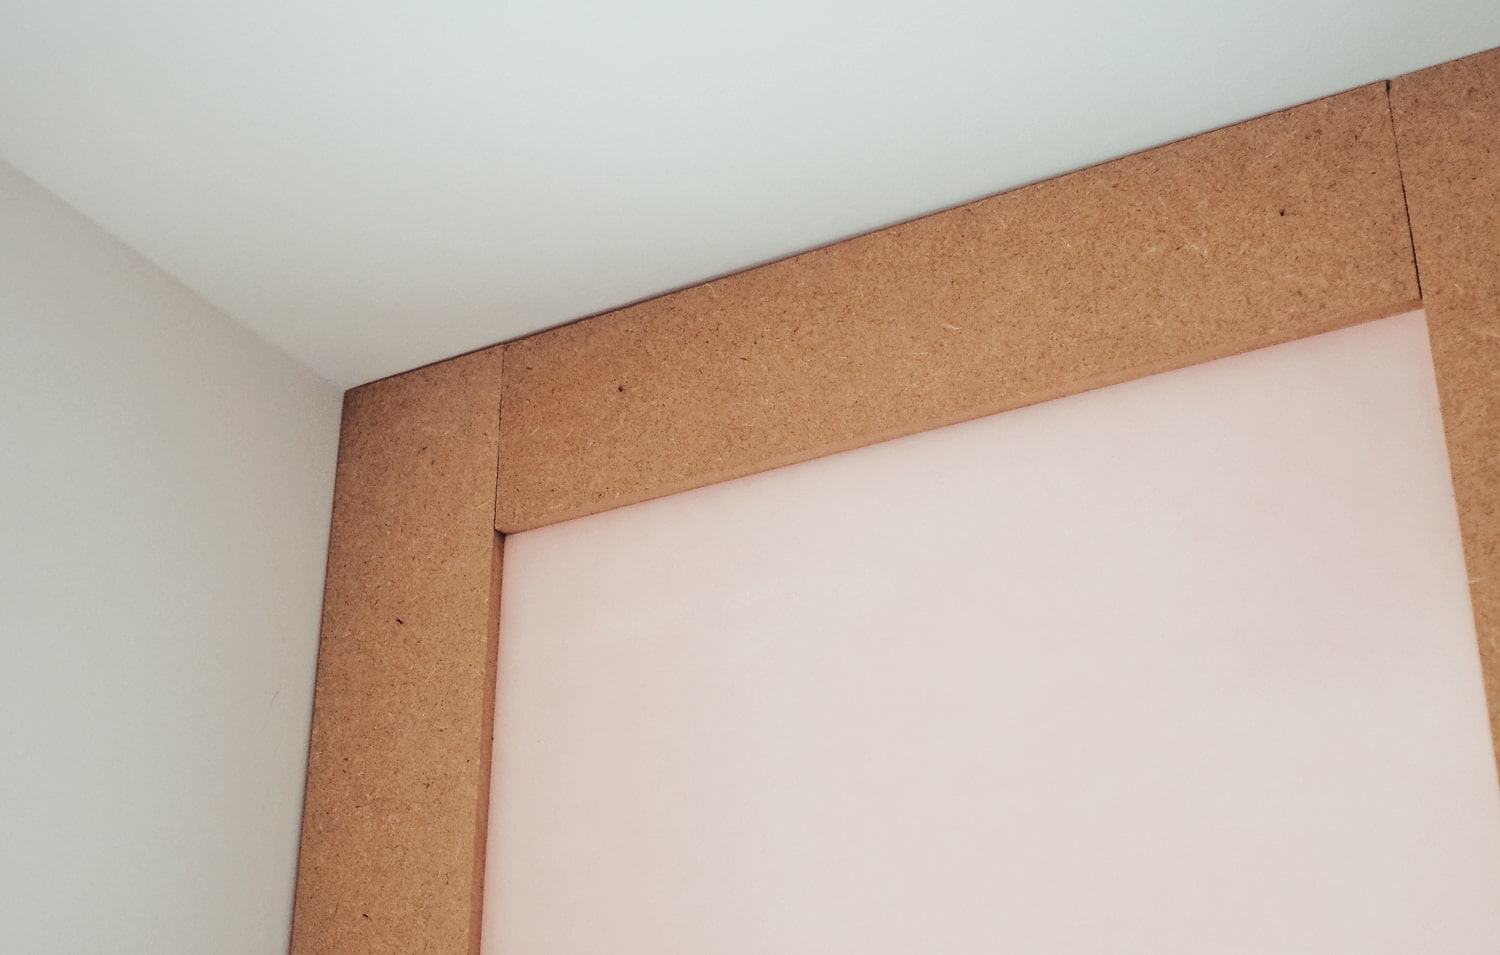
He sanded the joins down enough to a smoothest finish. Once sanded or if you don’t plan to sand these down, then remove all of the tack nails.

Use some wood filler to fill in the small holes left by the tack nails.
Another optional part, but in order to get a really nice join free finish, we used wood filler over the joins and left to set overnight.
This will add more time on to the project but the end result will be well worth it if you decide to include this step. But just be careful, this part is VERY, VERY, VERY dusty! Don’t make the same mistakes we did by not covering up anything that is in the room!
Step 6. If you used wood filler, sand down the wood filler until you are left with a nice smooth finish.
This is the part I would advise to use some sort of primer, but we are impatient and wanted it finished so we didn’t bother!
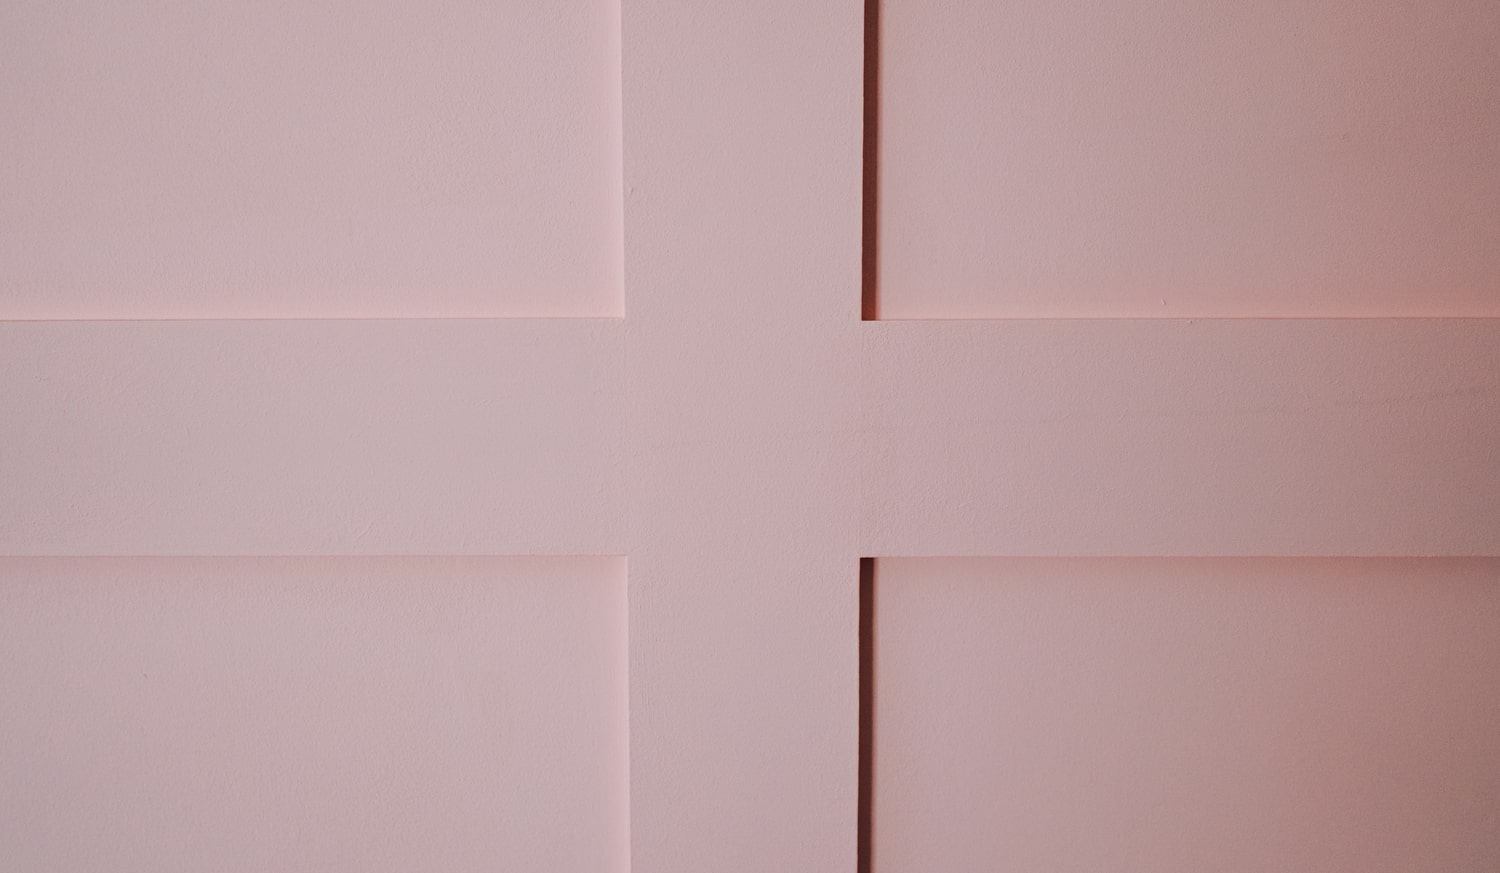
We instead added 2 layers of paint to the wood panelling, leaving an hour and a half between coats. This is one of the joins complete with wood filler, sanded down and then painted over the top. You can barely see the join which leaves a nice neat finish.
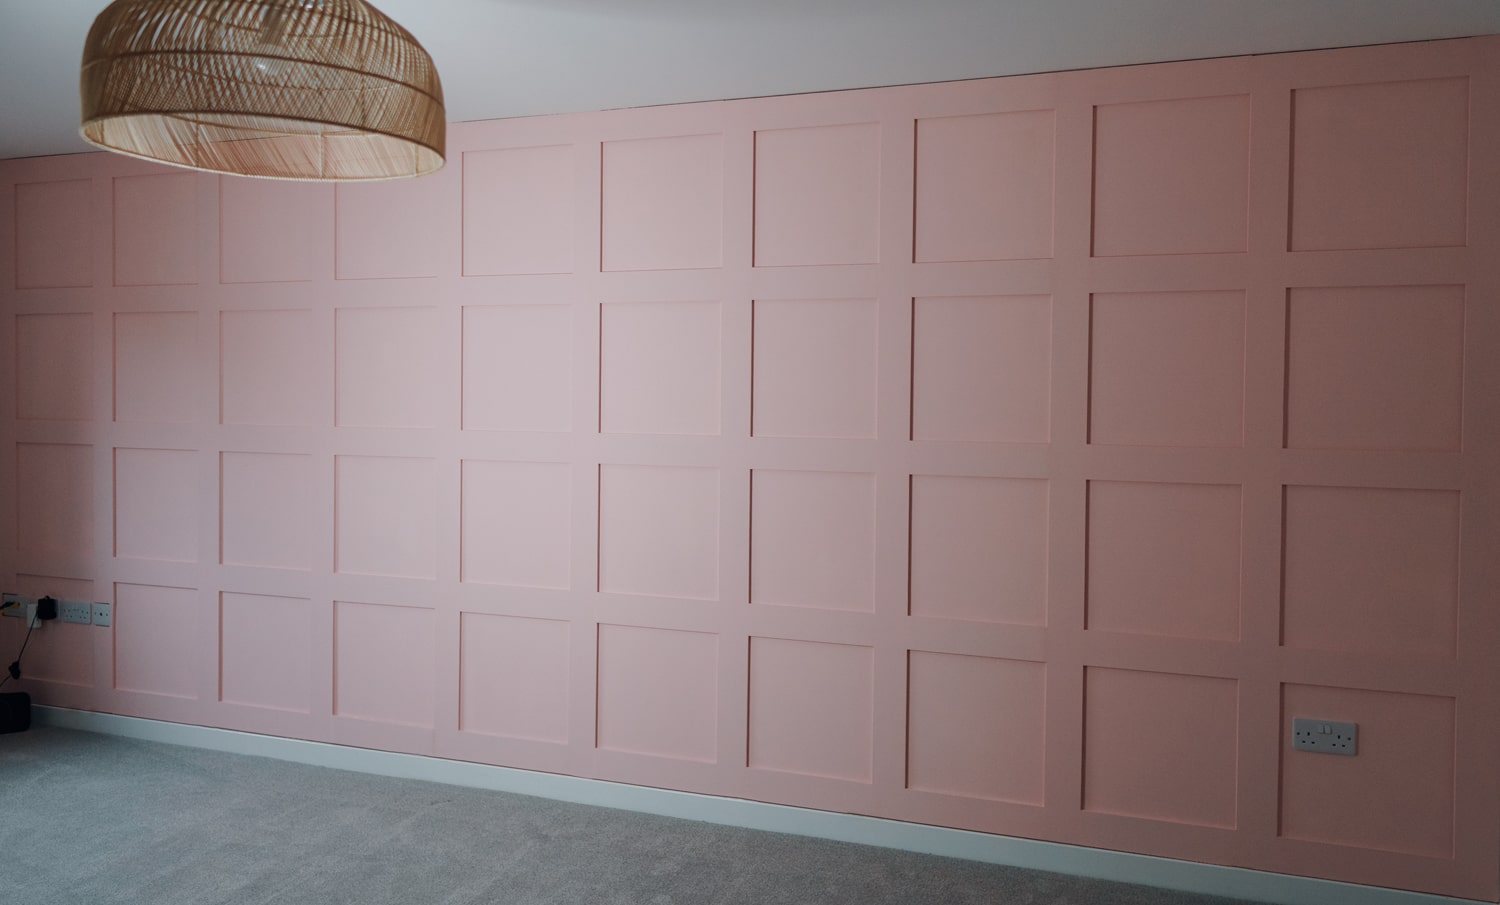
Step 7. Another completely optional step, but we wanted a nice finish around the edges so we added a layer of caulk around the complete outside edge where it joins the walls, ceiling and skirting board.

But if you don’t care about this part there is no need to add it.
And this is the part you stand back and marvel at how easy wood panelling was compared to what you thought, and how good it looks!
Here is our time-lapse of the complete wood panelling process from start to finish 🙂


Love this thank you for sharing, will defo be giving this a go in my living room!
That’s great that you’ve found this useful 🙂 I hope it goes well! x
This is stunning and ao very helpful. I’m looking at swapping my kids rooms so my 13 year old has the bigger room and I was thinking of this idea, you have given me so much helpful info that I’m itching to get it started now but now isn’t the time. Thank you so much, I will be looking to see if you have more blogs or if I can find you on ig.
Hi Kelly, thanks so much for commenting and I’m so pleased that it’s been helpful to you 🙂 I’m @whathannahdidnext on IG – let me know what you end up doing! x