This post has been on the to do list for a while now and my to do list is getting more out of hand as the days go by. Before I left work to start my maternity leave I had various projects that I wanted to crack on with at home and one in particular, was customising a sideboard with chalk paint. We had a space in the lounge that needed filling with a piece of furniture and I knew that a classic sideboard would be the best option and something that we will always have and wasn’t from Ikea. Look around our home and you will find lots of furniture from the lovely Scandinavian brand but this needed to be different and a keeper.
What I decided to use chalk paint on
I’m brand new to the world of ‘up cycling’ and doing up furniture and after some research, I decided to buy new (on the cheap) and change it into what I wanted. So what I ended up doing was not up cycling but more transforming. I love a lot of the shabby chic style but also find some pieces an acquired taste and more shabby than chic. To buy something new that would have been to my liking would have been ridiculously expensive and I was having trouble finding the colour that I wanted too. I found a beautiful white dresser on a local Facebook selling page and very nearly bought it until I got the tape measure out and realised it was a rather petite dresser and the price tag suddenly seemed pretty high. So the obvious answer was to paint something myself and cut out the middle man.
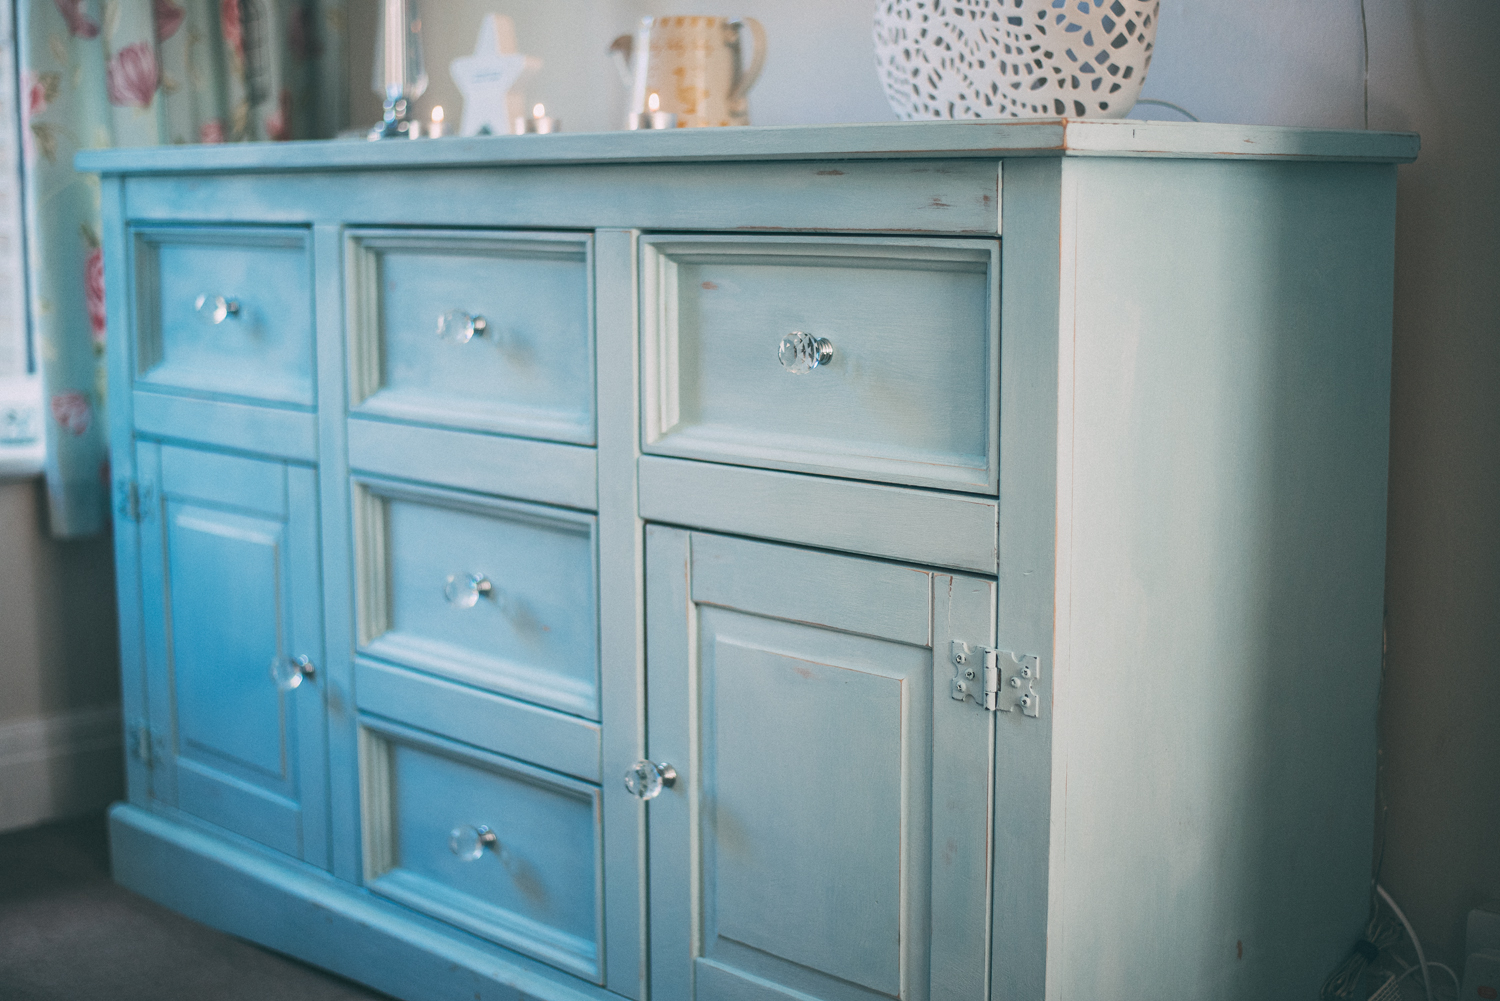
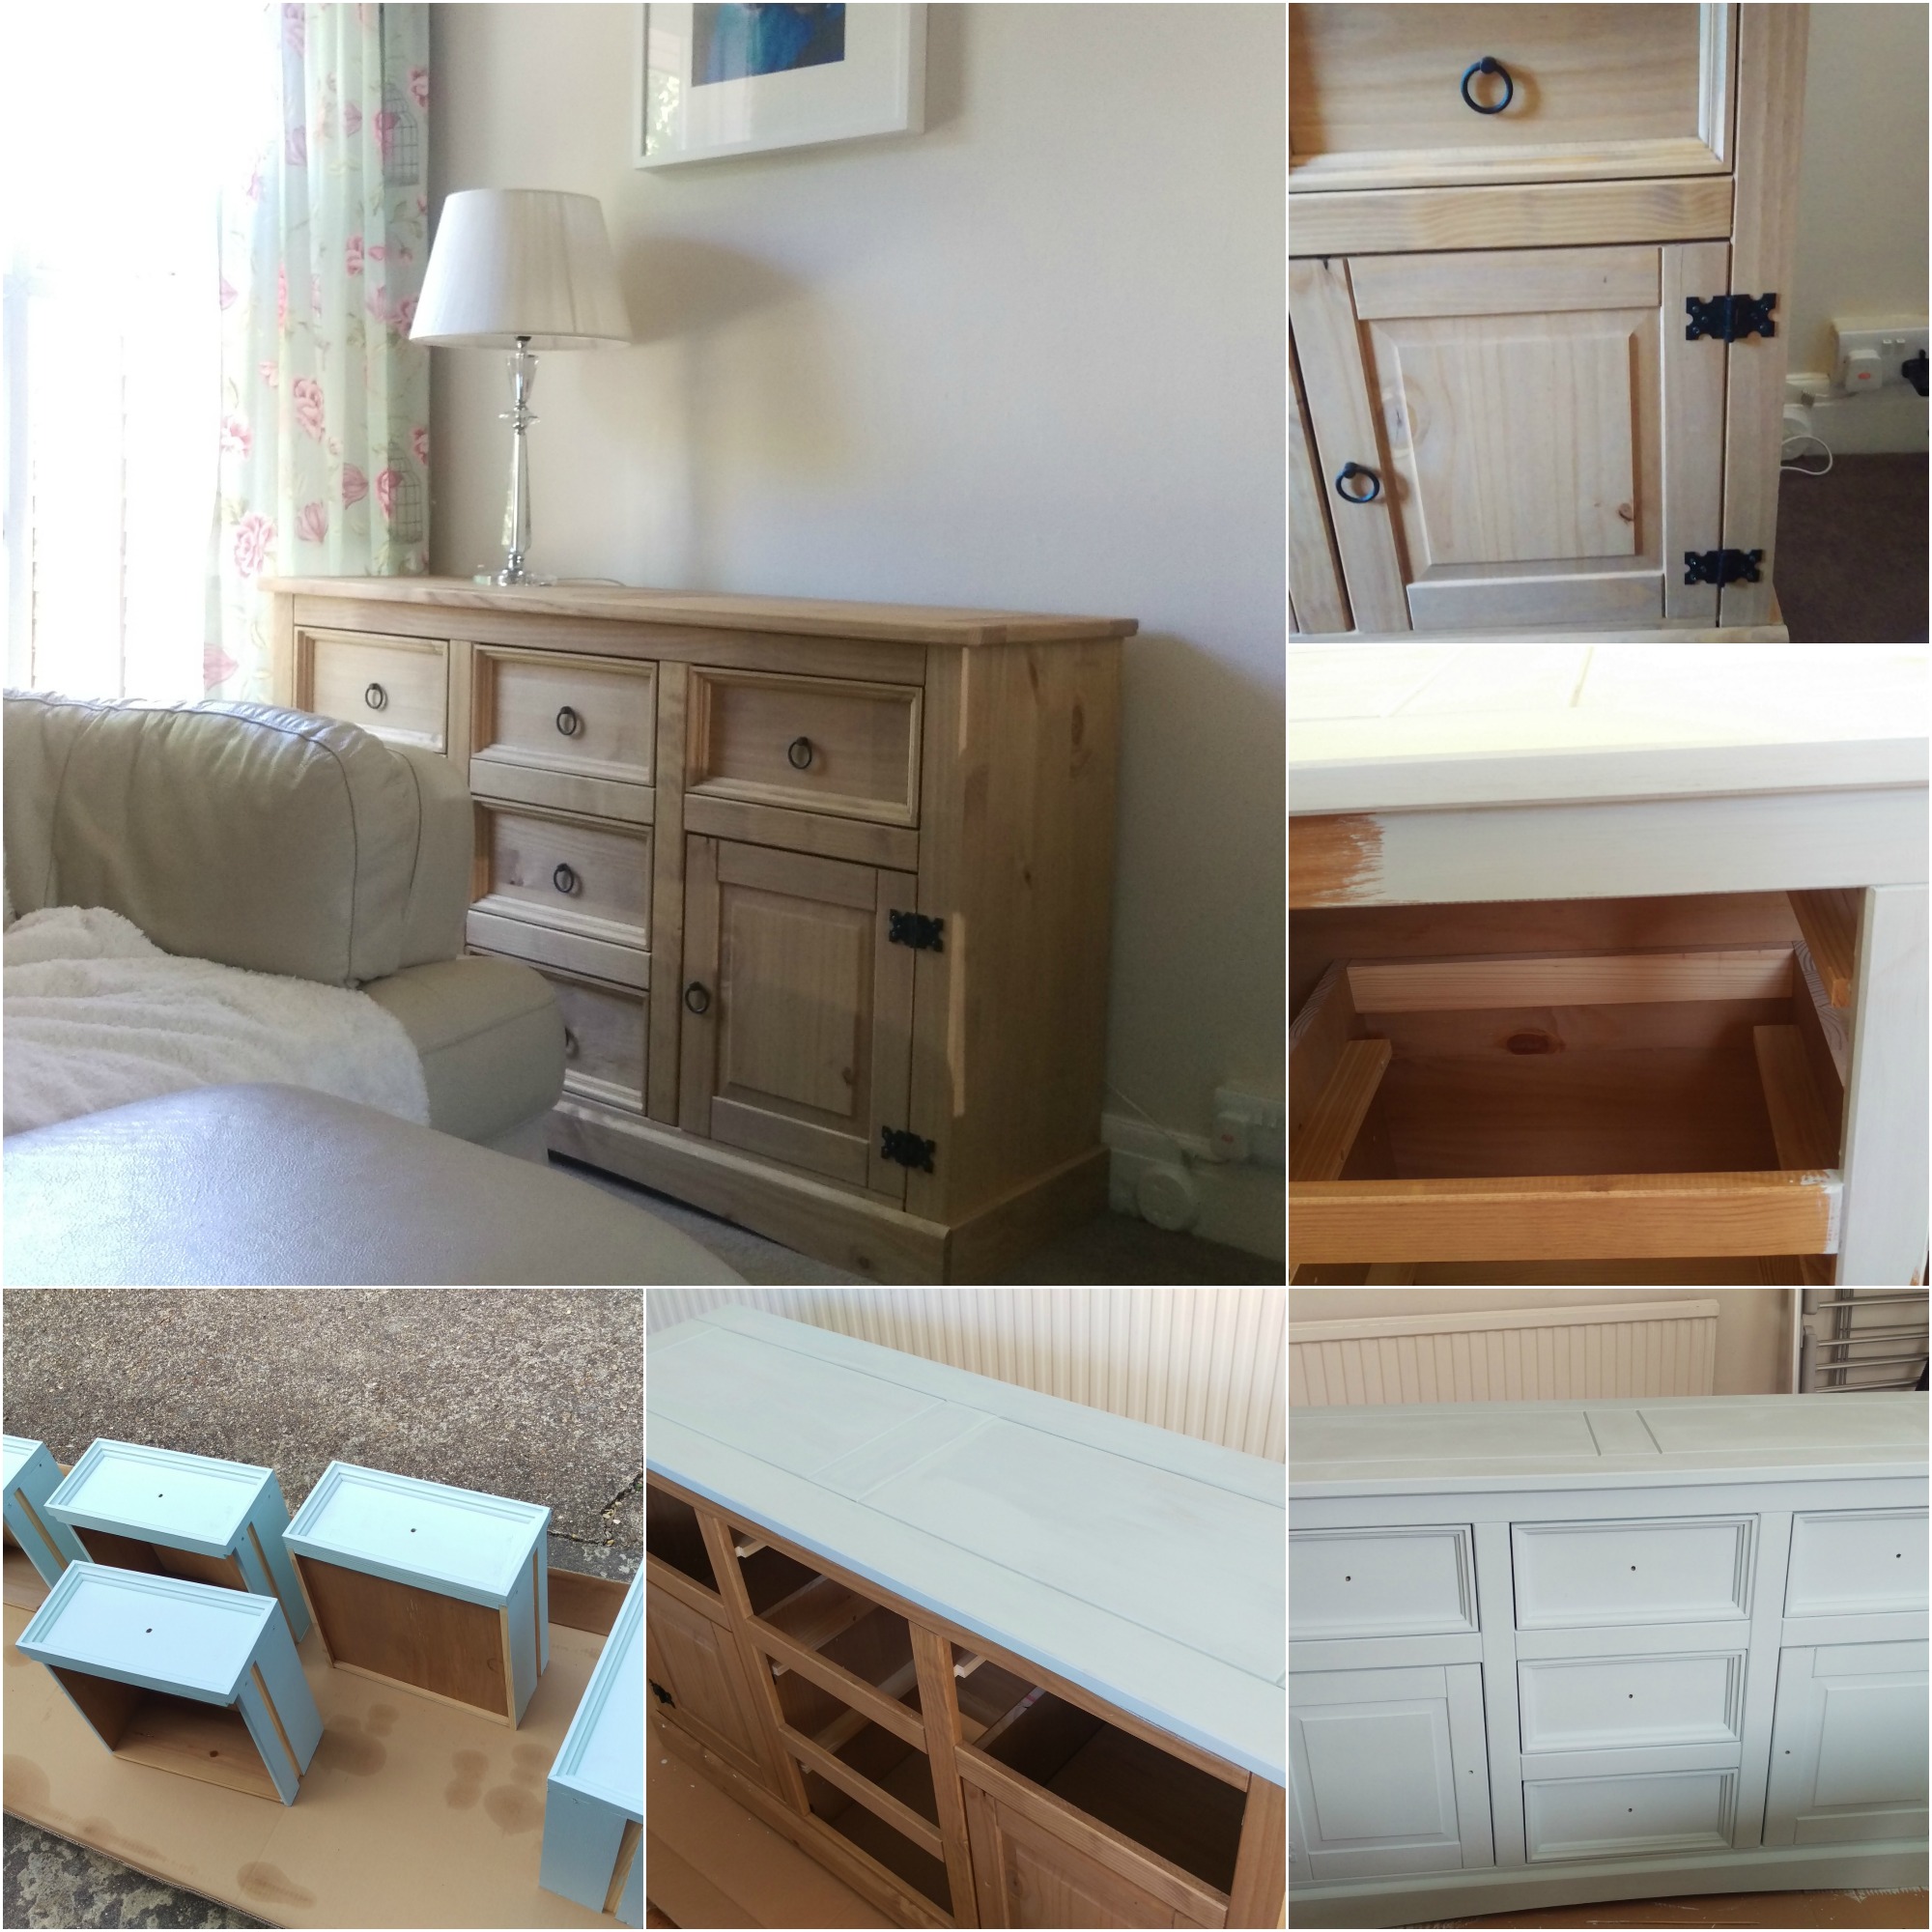
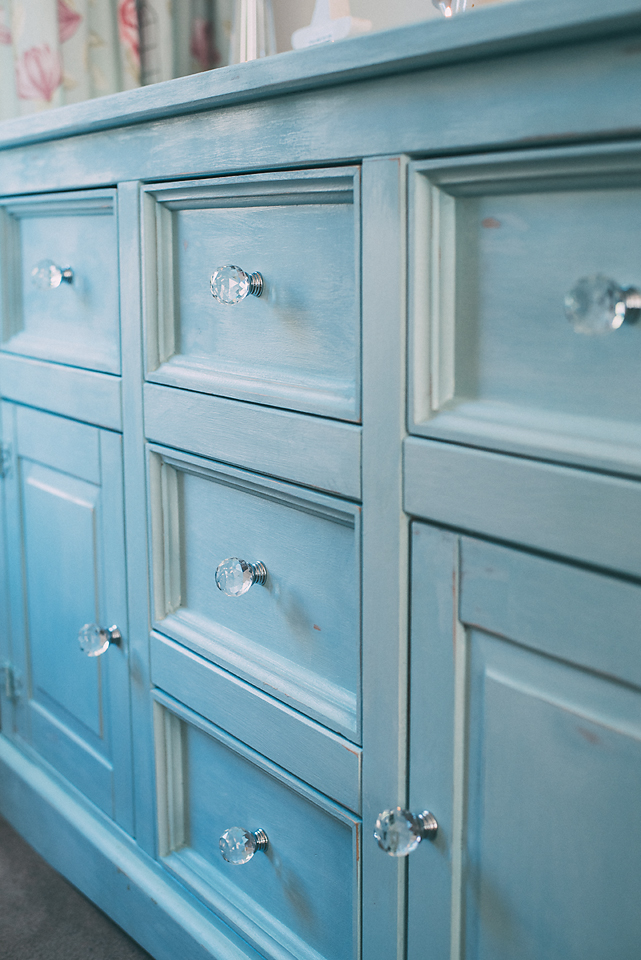
So after I had driven myself crazy looking for sideboards of the old and new variety, I settled on a new pine Mexican corona unit that was reasonably cheap and pretty well made. It was to be my blank canvas to work with. I really disliked the black hinges and the drawer/door handles but knew that I could change these and change the overall appearance to make it unique and more to my taste.
My husband very kindly put together the sideboard when it arrived and it waited there for a few weeks until I was ready to start. I don’t think he ever thought that I would get around to actually starting the project, he has lots of faith in me like that! Anyway, I did however get started when I had a child free day during the summer and I had to fully make the most of that one day. In essence I like painting but I’ve never been so keen on the commitment it takes once you’ve started. However, this was much more exciting than painting four walls and didn’t require any knackering roller action. My only hindrance was that I was about 34 weeks pregnant at the time and it proved challenging to paint some parts and required lots of squatting. It’s not like I wanted to make things easy for myself in the last weeks of my pregnancy…
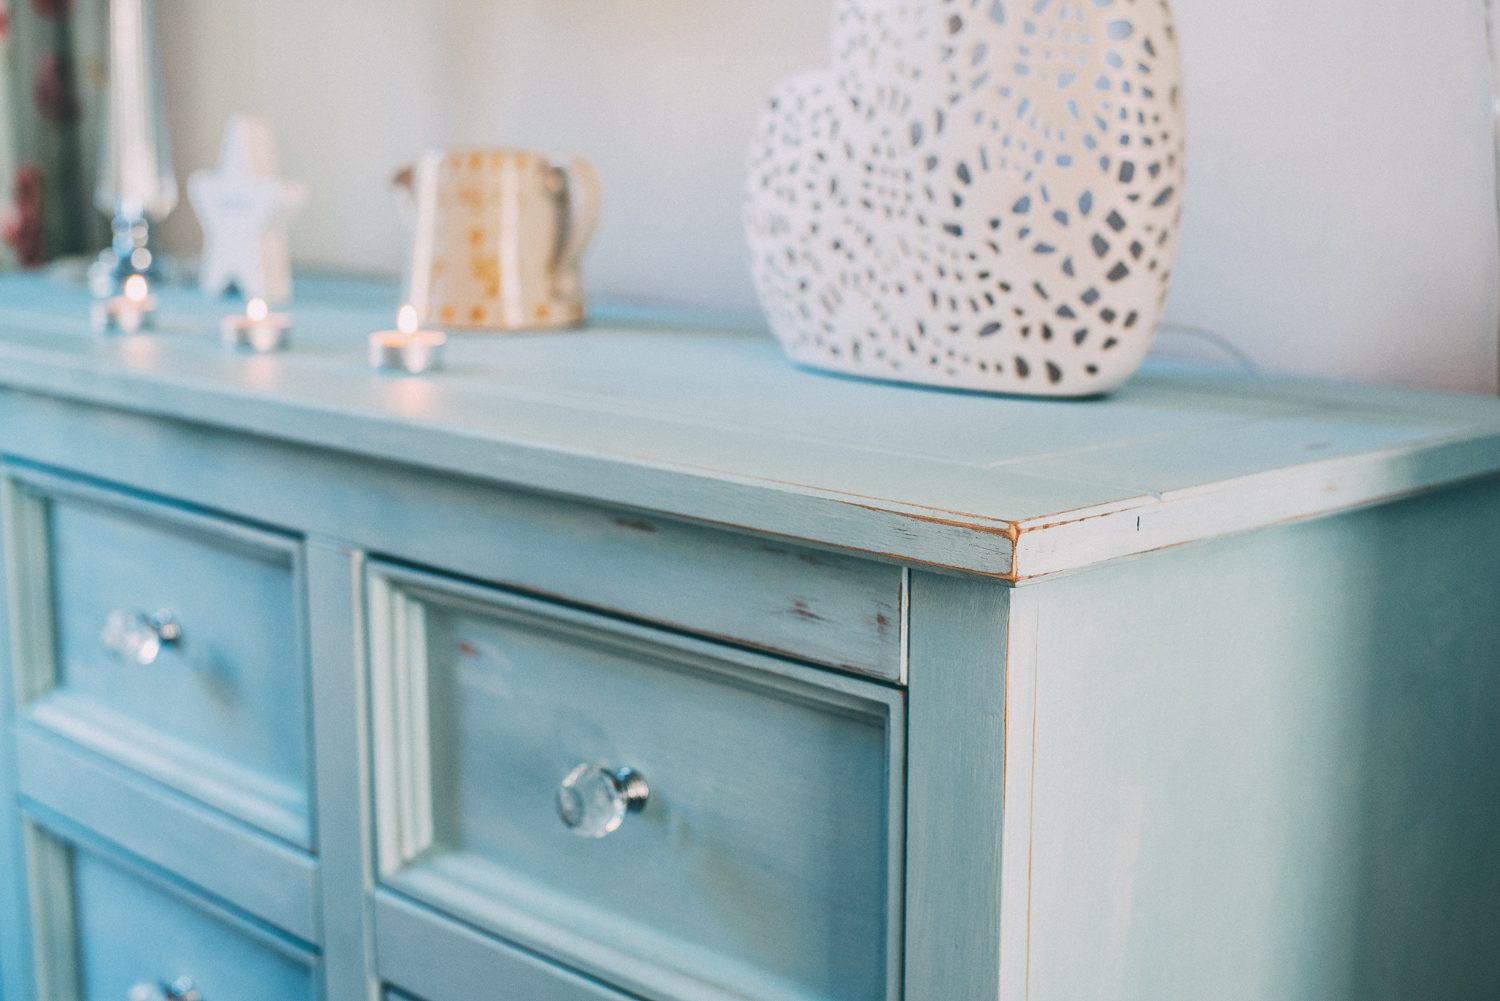
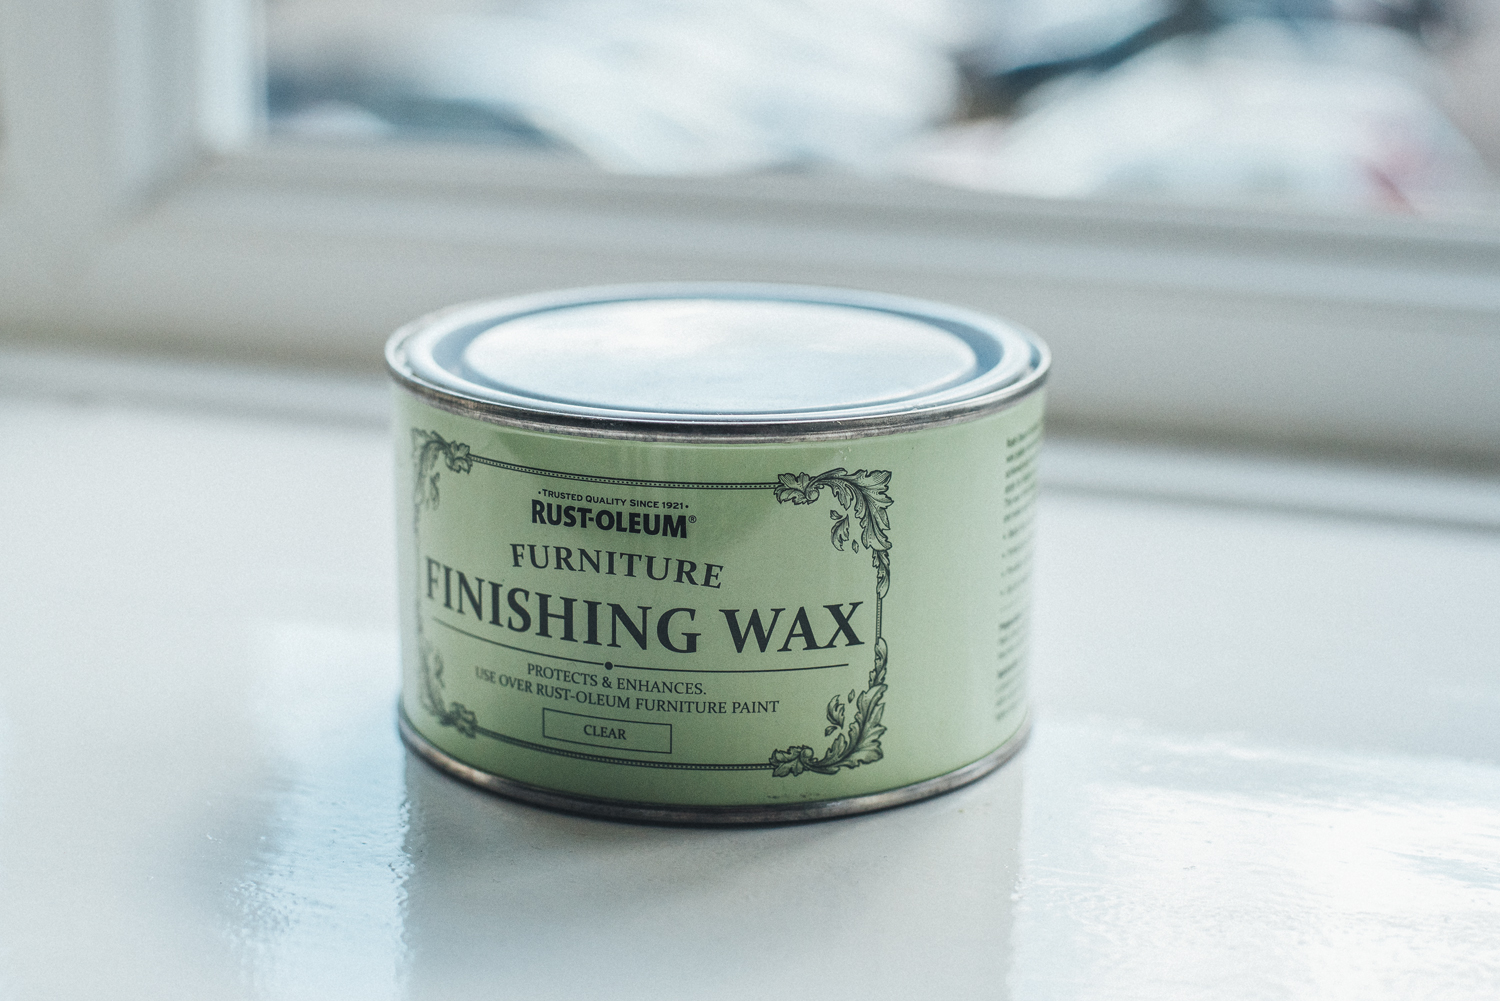
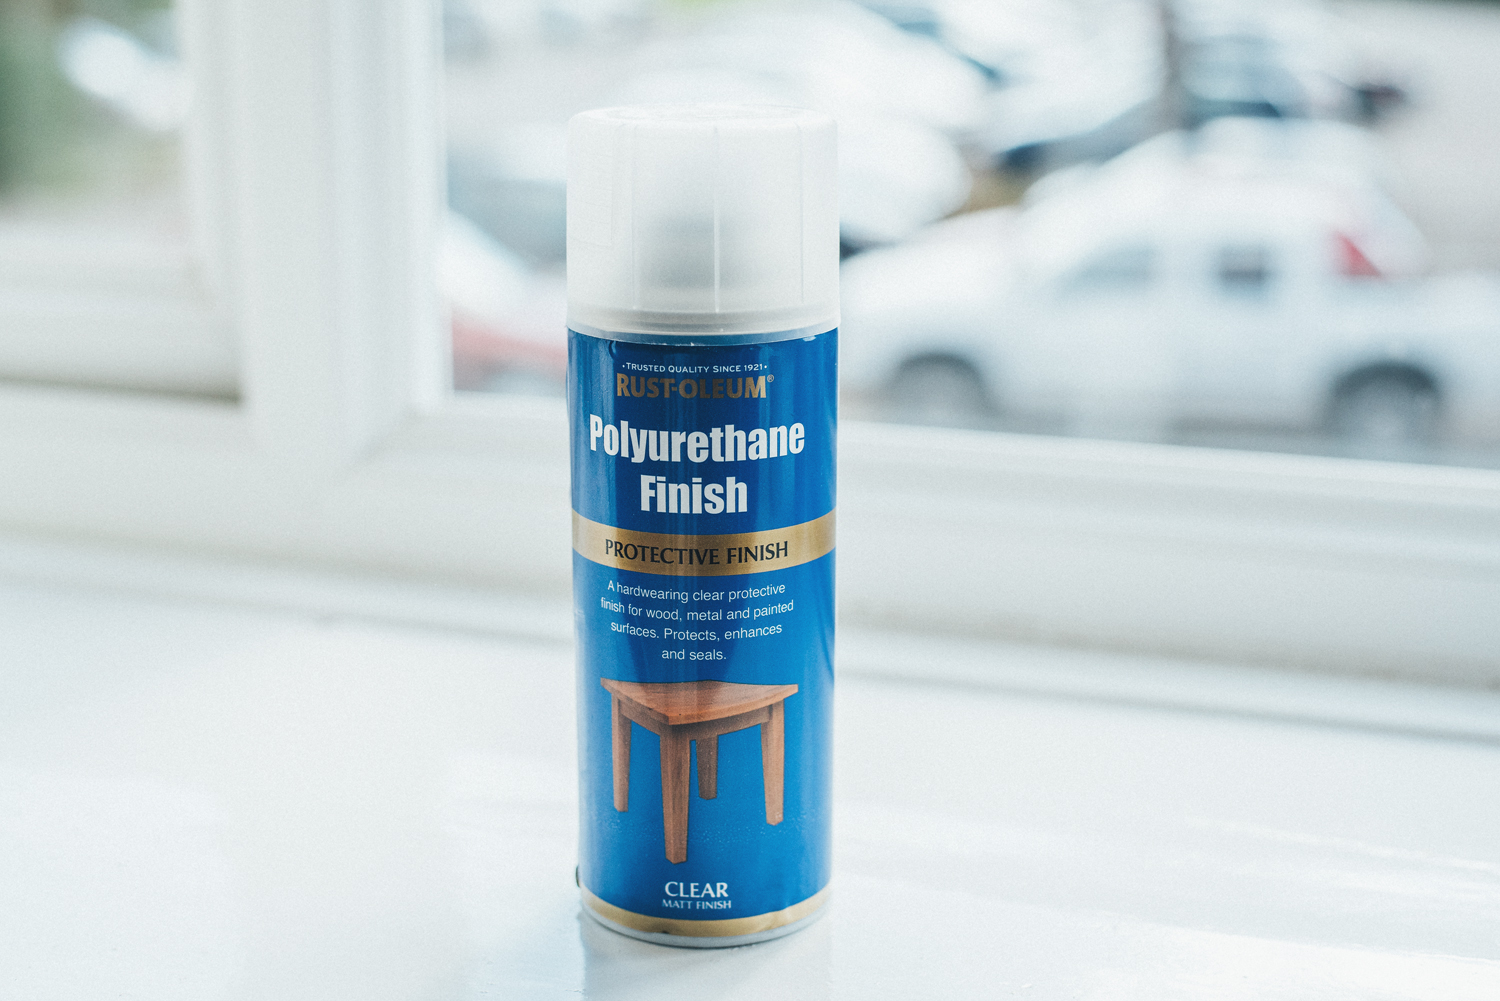
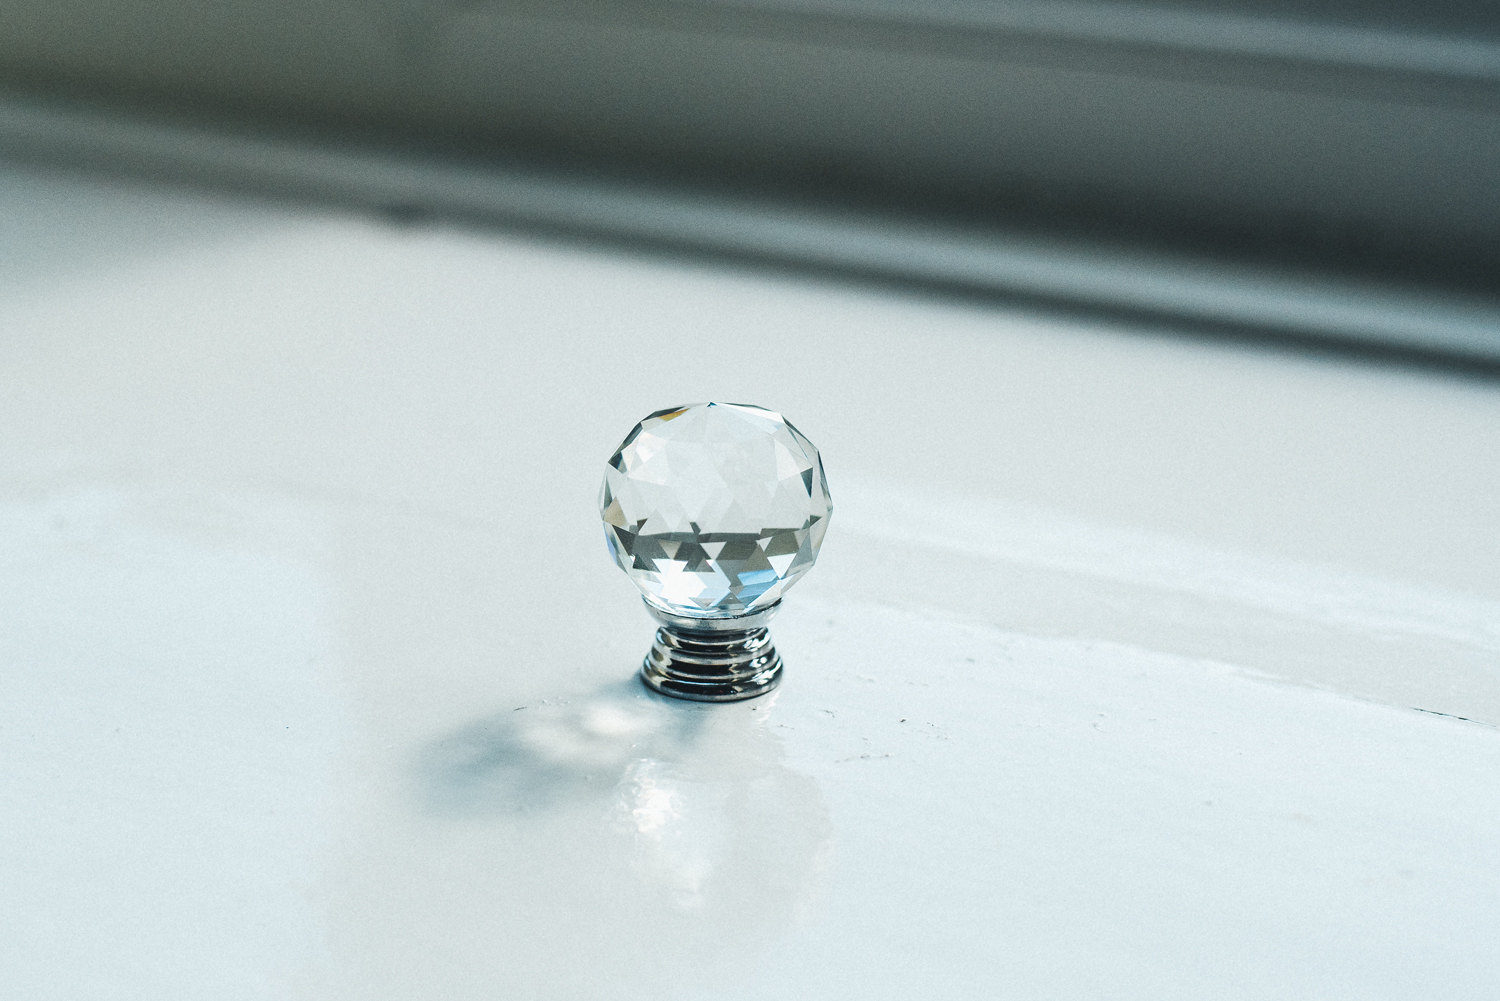
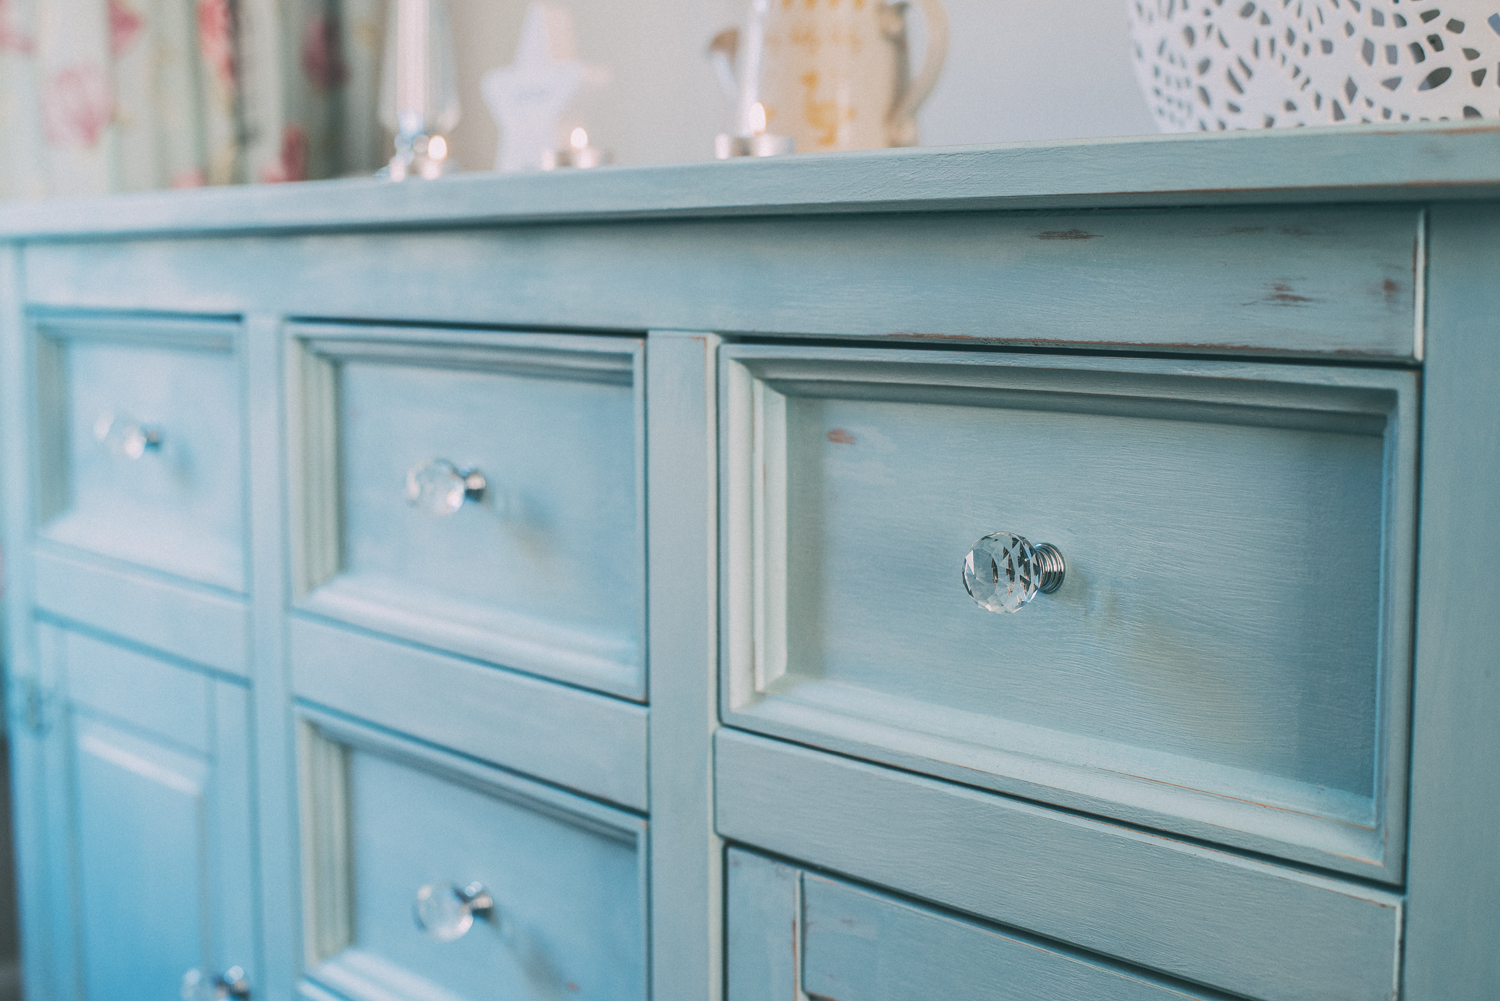
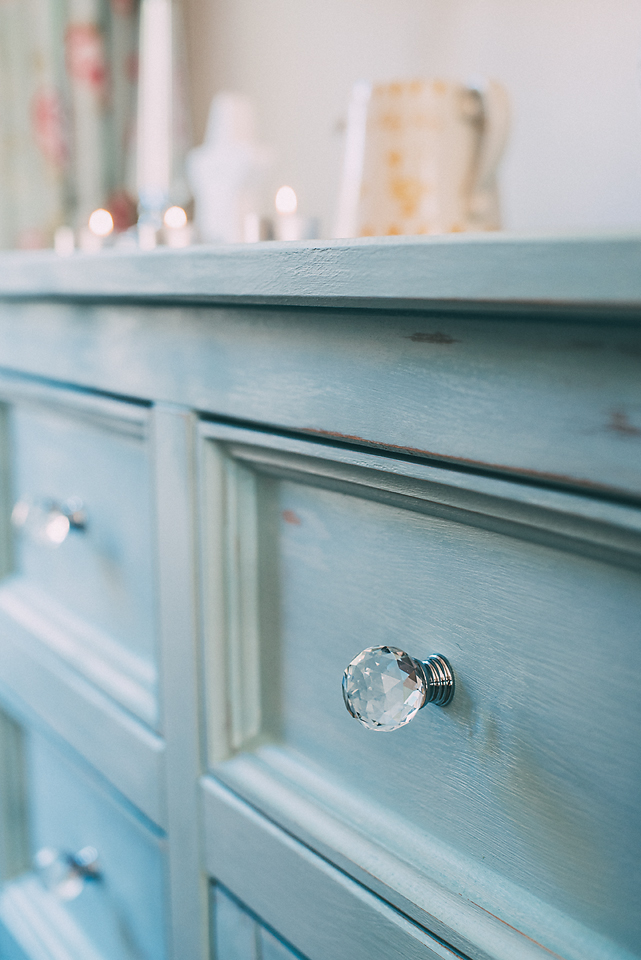
After lots of research about chalk paint, I decided on using the Rust-oleum range of paints and waxes and instantly fell in love with their duck egg shade of paint. I bought all the other paraphernalia needed such as paint brushes, sandpaper and cloths for buffing the wax. I also ordered some beautiful crystal effect knobs to go in place of the black hangers that came with the unit and these were a bargain from Amazon compared to what you pay for them in DIY stores.
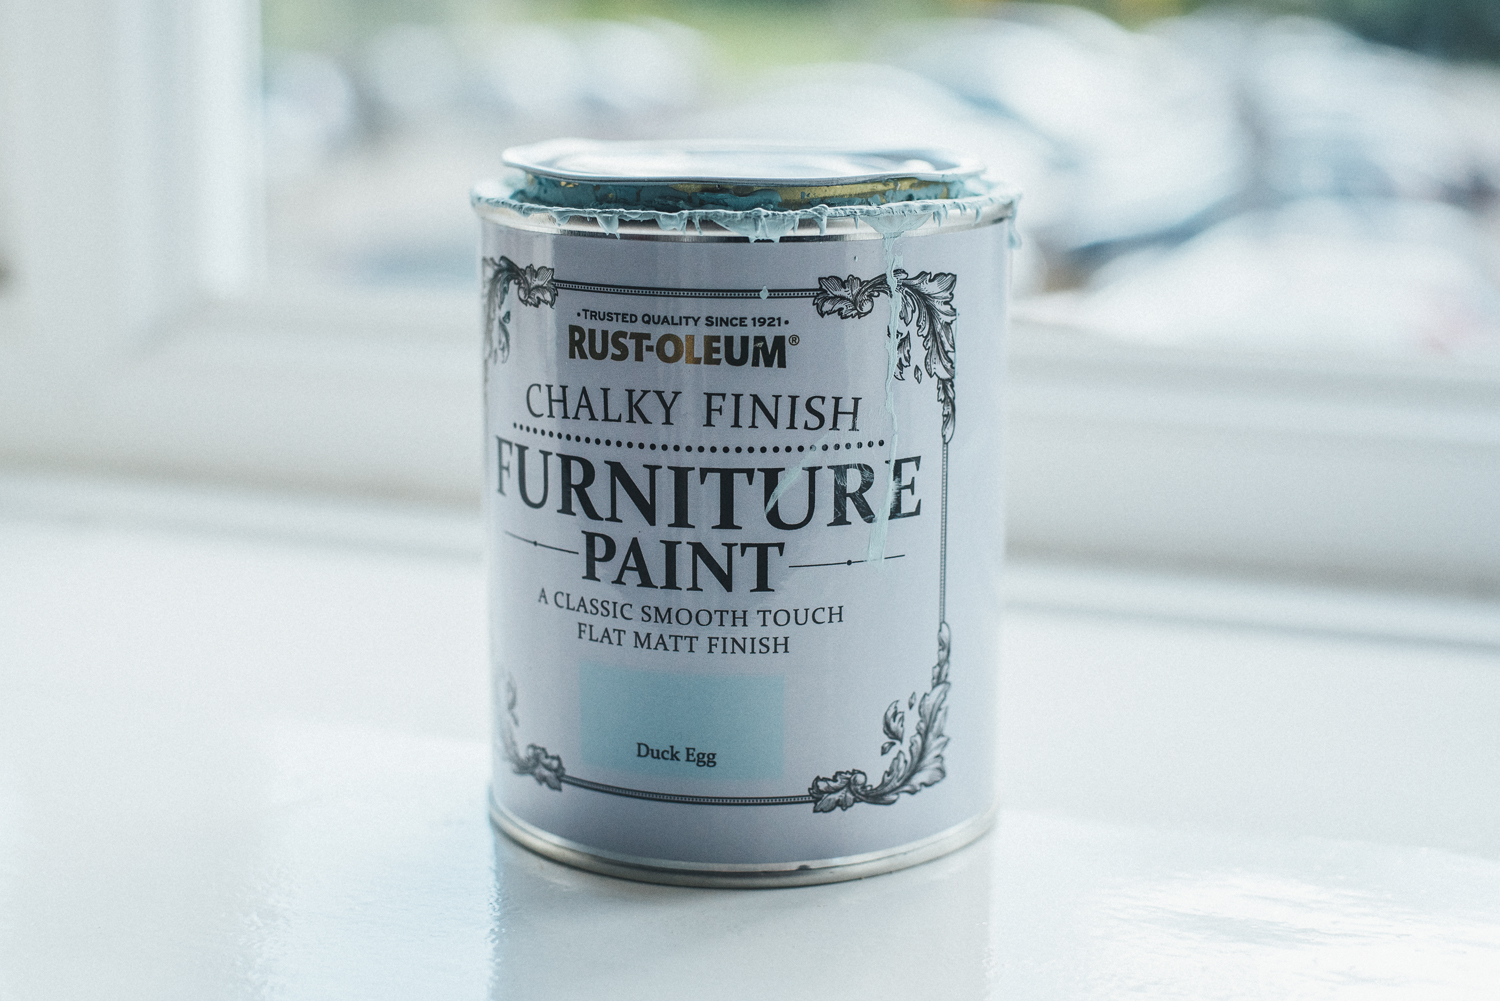
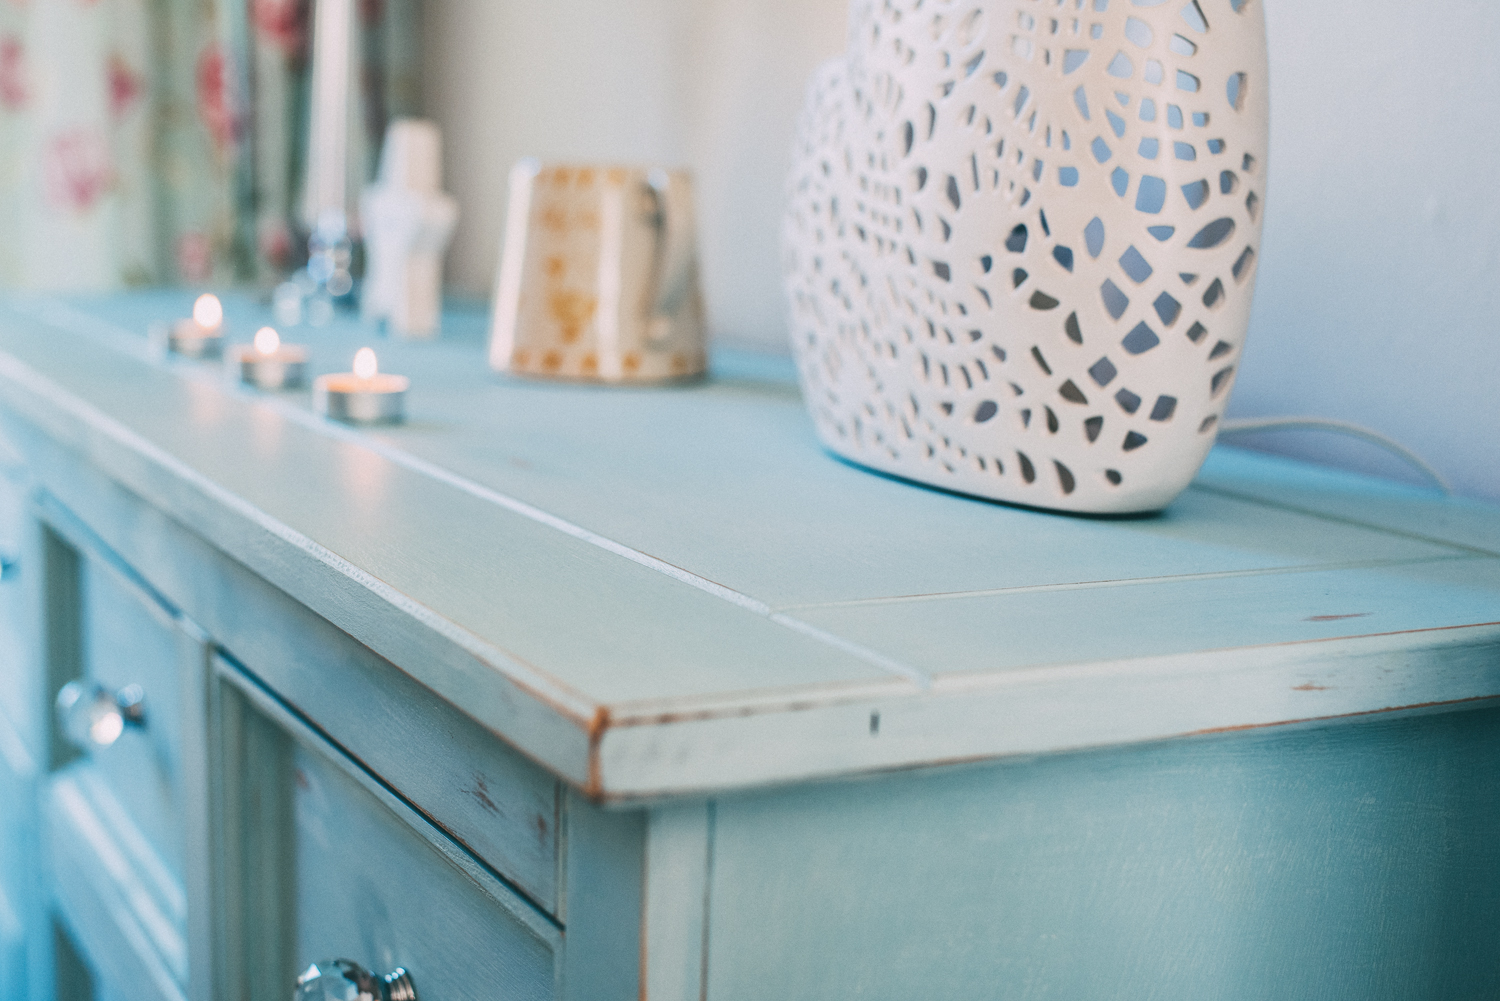
This chalk paint doesn’t specify that you sand down furniture before painting, so it was easy to just get straight to the job at hand. I applied two coats to the sideboard and because it was a very warm day, I I didn’t have to wait too long between the coats drying. Handy, as I can be quite impatient like that. I then decided to set aside another day to ‘distress’ the unit and then eventually wax it to protect it. I faffed an awful lot over whether I should distress it or not. I’m not a fan of the over distressed look but yet the coverage wasn’t as smooth as I would have hoped for it to remain a block colour. I eventually sanded it down as much as possible to smooth out the surfaces and this in turn led to areas being distressed. I wasn’t too brave though and would distress too much and then paint back over it again only to distress a little more again. I had to stop at some point and figured it that the effect was as good as I was going to get it. As I sit here now, I’m still not sure about the sanded patches in some parts so I guess I’ll never be completely happy. For future projects I certainly think that painting with two colours (a darker base colour and lighter top colour) is a good idea for when it comes to sanding. The contrast of the pine underneath doesn’t look so effective.
Once this stage was done, I moved onto the final stage of waxing. I was nervous about this part as I had read that care needs to be taken applying the wax to avoid yellow staining and I knew that outcome would most typically happen to me. As the wax smells extremely toxic, I bought a mask to protect myself but it was still pretty tough with the fumes. I applied the wax as stated with a lint free cloth but was disappointed to find that I couldn’t really see how far the wax was spreading. I waited for it to dry and then got to the real elbow grease part, the buffing! Despite buffing (and puffing) away, I couldn’t produce much of a sheen and I was worried about the dreaded yellow tinge, which seemed to be visible between the grooves on the drawer fronts. As the wax stunk to high heaven and I wasn’t comfortable covering the entire sideboard in something that might taint it, I scrapped the wax. In the end I settled on a polyurethane spray to seal the unit, as that was my main priority. This time however, my husband was armed with the spray while I stayed well out of the way!
I knew that my first project wouldn’t be all plain sailing but I wanted to just get on with it and learn along the way. For me the key was to research fully all of the different types of paints and finishes you can apply to furniture. I wanted to try chalk paint as it’s quite popular to use but I also found that you don’t necessarily need to shell out on these more expensive paints when you can use cheaper latex paint for example. It all depends on the effect you are after and what type of furniture you are working with. I’ve learnt so much from this venture and I now know what I will and won’t do with my next piece.
What I have ended up with is a piece of furniture that is bespoke for me and something that I am proud to add to my collection of furniture that will last throughout the years. It may not be perfect but at least I won’t see it in anyone else’s lounge as it’s unique to this home. It has been a labour of love but one that I am glad I took the plunge to do. Now what next?


I think it looks lovely, and I really like the Rustoleum paint & wax as I find it goes on nicer than another (more expensive) brand – I want to paint my tv stand next in grey, which I’ve used underneath white on a chair I did. Make sure you enter this into the monthly competition that Rust Oleum have.
Thanks Helen! I’m glad I didn’t choose the other brand as I’d heard it wasn’t so great to work with. Grey sounds lovely for your unit, have you done a post on the chair you did? Would like to see it. Thanks for pointing out the competition, I’ve entered. Got to be in it to win it! Worth a go at least…x
Well done you, it looks fab!! I’ve been meaning to have a go at this for ages. I have loads of furniture I want to upcycle. This is very me and just the colour I’ve been eyeing up too. gorgeous! xx
Majorly late replying! Ooh you’ll have to let me know if you manage to do anything. I’d love to do more but it’s all about having the time at the moment. It’s very much trial and error with the paints and finishes, practice is what it needs xx
LOVE this, I have not tried Rustoleum paint onyl other chalk brands, which I wasn’t hugely impressed with, may have to buy some and give it a go. Love the colour xxx
I love duck egg and knew I had to get this colour. I chose this brand as it’s cheaper than some and the painting process was good, it was the waxing that wasn’t so fun. Still not happy with the finish, so it may have more work done to it yet xx
How easy was it to remove the black handles etc and were you left with any marks? Thankyou
Hi Lisa, it was really easy to remove the handles, as they were fixed with a screw on the other side of the drawers. There were no marks left but the knobs I put in place more than covered the area anyway 🙂
Hi , if you still have this page plssshelp. Where to get knobs ? I dont know which one or what size screw i have to use plsss. I painted but cnt find knobs ?
Hi Zula, I replied to your email. I hope you received it? The knobs were from Amazon 🙂
Hi, it looks just beautiful! I found you because I searched how to replace corona hinges! Did you manage to find an alternative, or did it just look so great when you’d painted, you didn’t need to change?
Hi Susan. I never got around to changing the hinges and just painted them and I think they look fine! 🙂