Every now and then I’ll see an idea that I really like the look of and what want to have a go at. Sometimes it’s nice to have some unique pieces around the home that aren’t mass produced and bought off a shelf in the shop along with everyone else.
When I saw these quirky coasters from Mouldd I knew that it was time to get some more coasters and I was more than happy to give the craft a try. Mouldd are a UK run business who have put together kits to enable you to make your own coasters made out of resin and the possibilities are simply endless! I love how they are something you can make for your home that is completely unique and handcrafted.
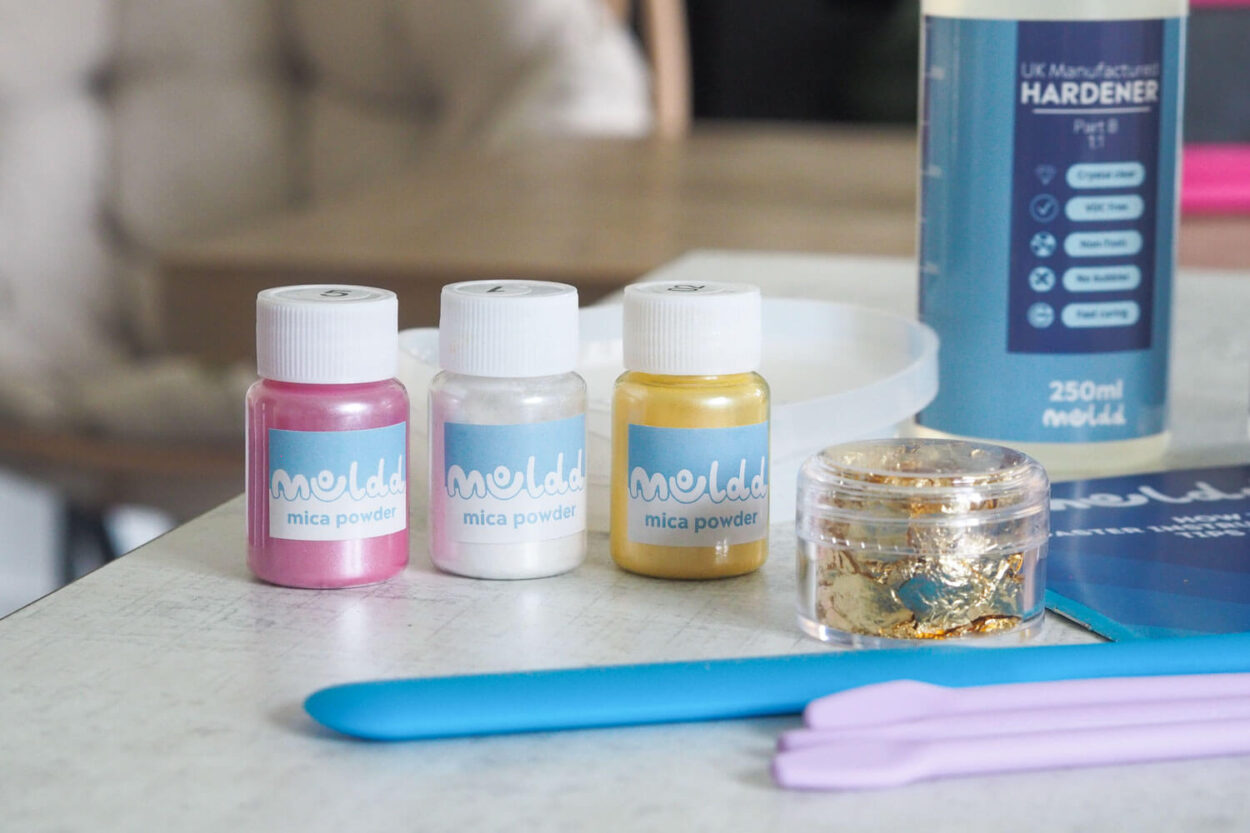
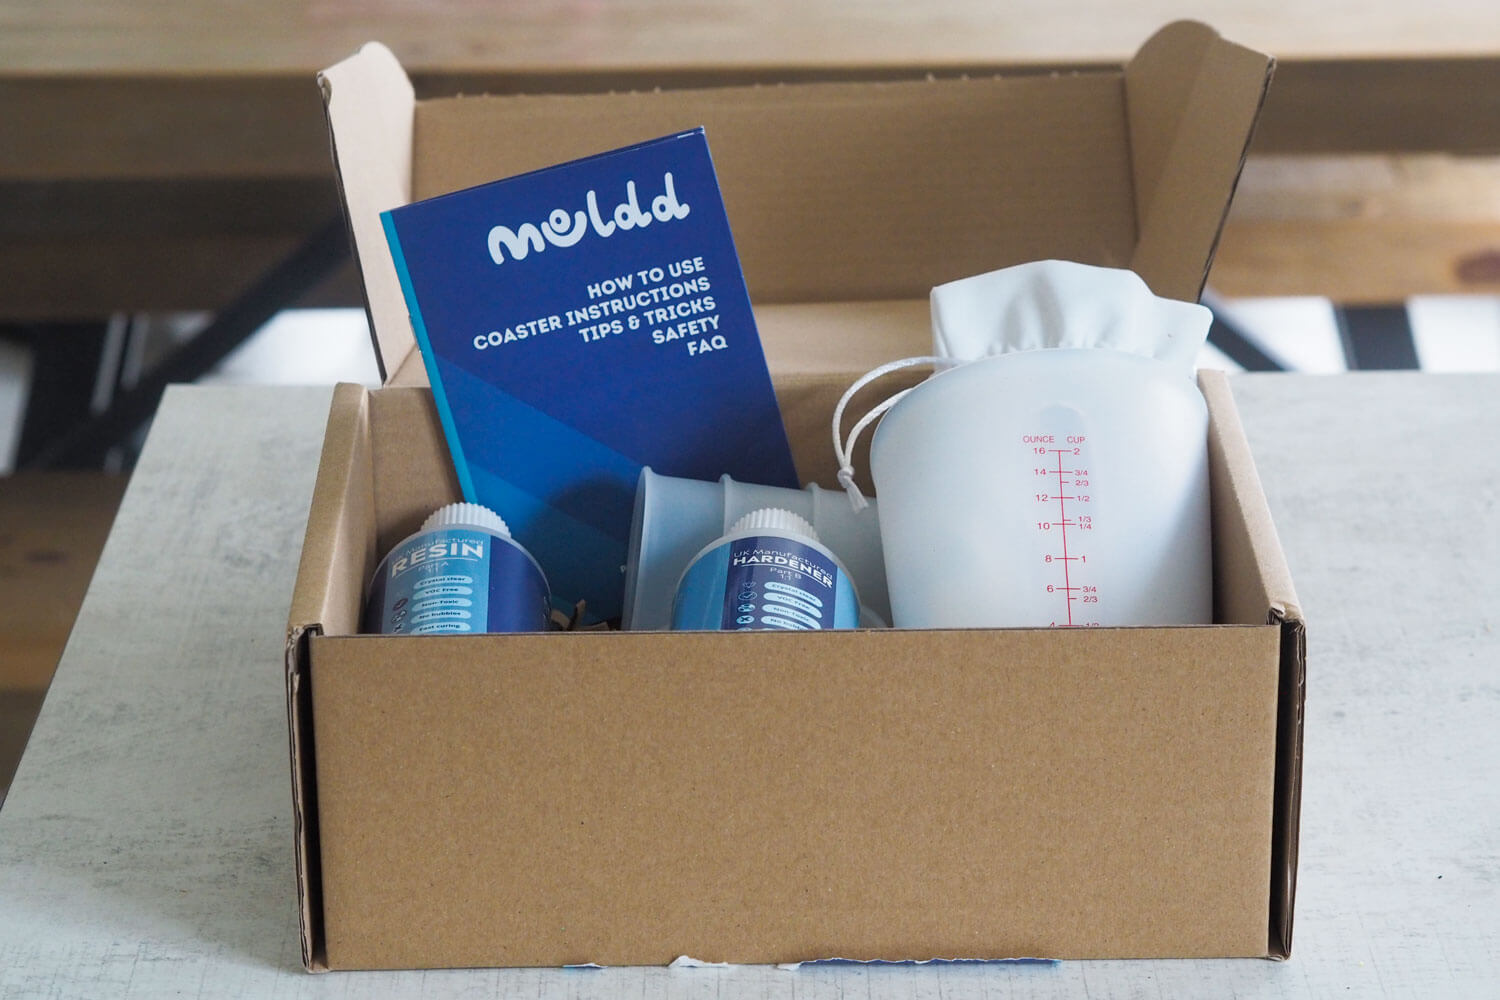
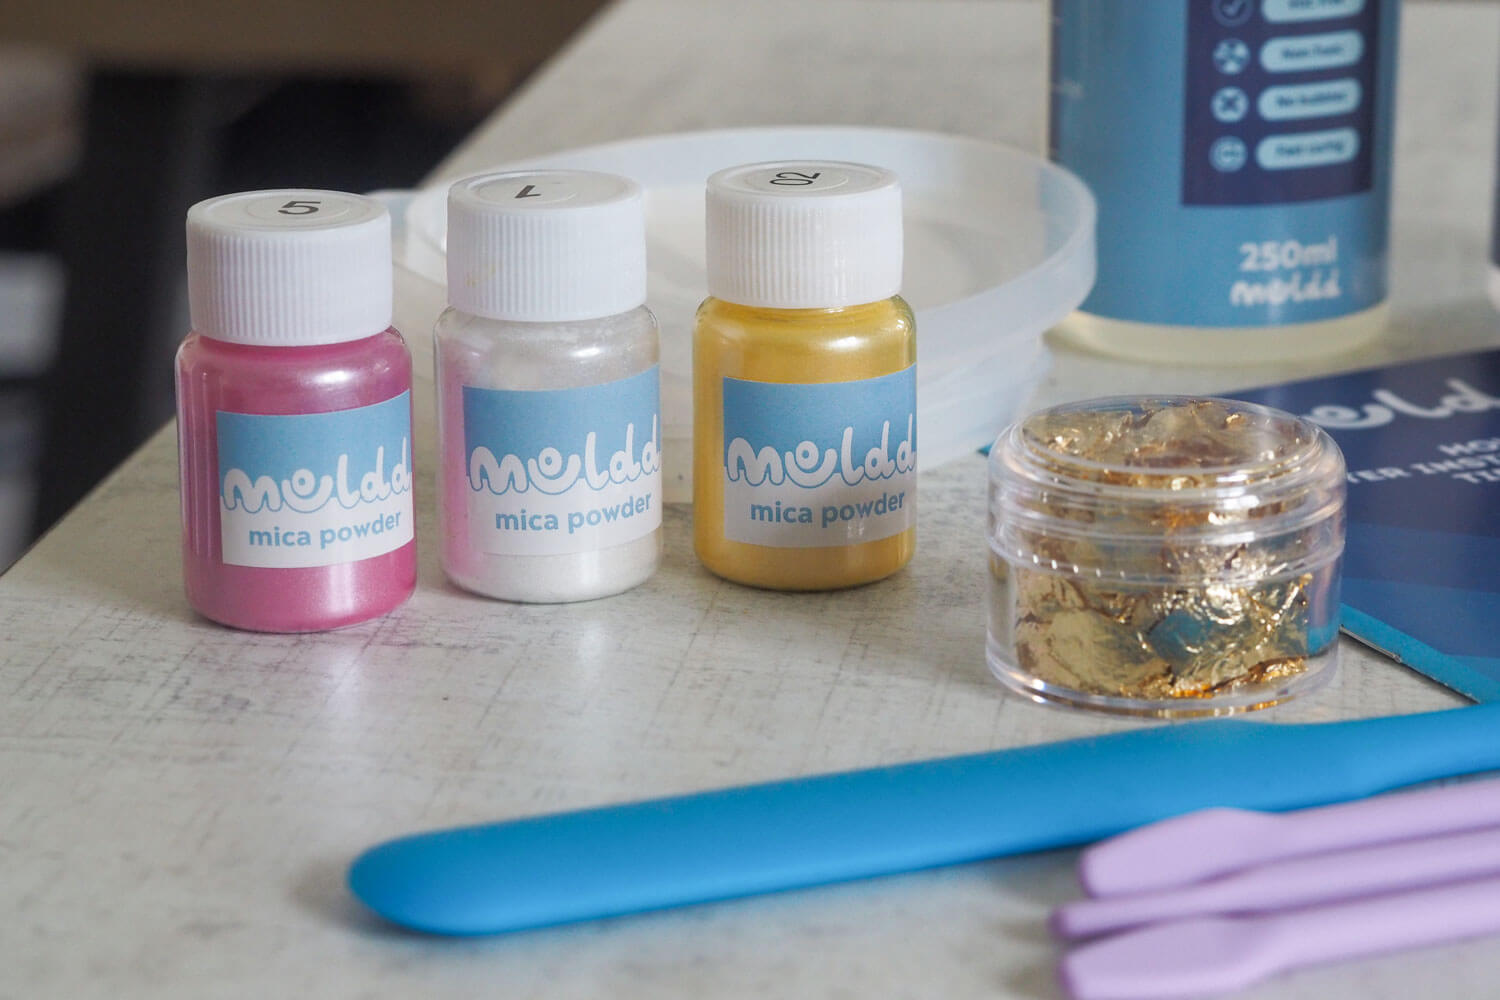
What comes with your resin kit
Within the kit you get everything you need to get started and all you need to do is to choose the style of the coaster you prefer – circle, square or jagged. It comes with a step by step guide on how to use the resin kit to get the best results, so I strongly advise that you read it fully and don’t try and skip parts. It’s a messy business and one that you need to make sure you’re fully prepared for.
I covered the table with a plastic painting cover the kids use and used some hard acrylic sheets we had knocking about in the garage. These were rigid enough to place the silicone moulds on once filled and lift away from the painting sheet. So bear in mind that when you fill the moulds, you will need to leave them to cure for 24-48 hours, so if you move them the mixture will move around unless you have them on something firm. A piece of cardboard would do the job too, but you would just need to make sure that it’s nice and flat so that your coasters set evenly.

Who is it for?
I’m not the most crafty person but I really wanted to give this resin kit a good go, as the effects you can create with resin are stunning. I roped in my creative 13 year old to help me with the mixing and we both made two coasters each. Like with most things, you learn as you go along and we quickly picked up on what would and wouldn’t work.
I’d seen video clips of flowers being incorporated in the silicone moulds and really wanted to experiment with that. I went out into the garden and picked a variety of small vibrant flowers and leaves to add to the mixture. However, getting the flowers to sit well in the resin was trickier than I imagined and the overall effect would probably be better with flowers that have been pressed beforehand, to avoid edges protruding through the resin. I also picked some pink leaves and a purple flower for one of my coasters and they looked beautiful when in place, however I found that after a few hours, the pink leaves had turned green and the purple petals had turned blue (which looked amazing) and then completely disintegrated! The end result was not what I wanted but it was a learning curve to find out what will actually work and what won’t. I hadn’t considered the effects that the chemicals would have on the flowers, but of course it makes sense now.
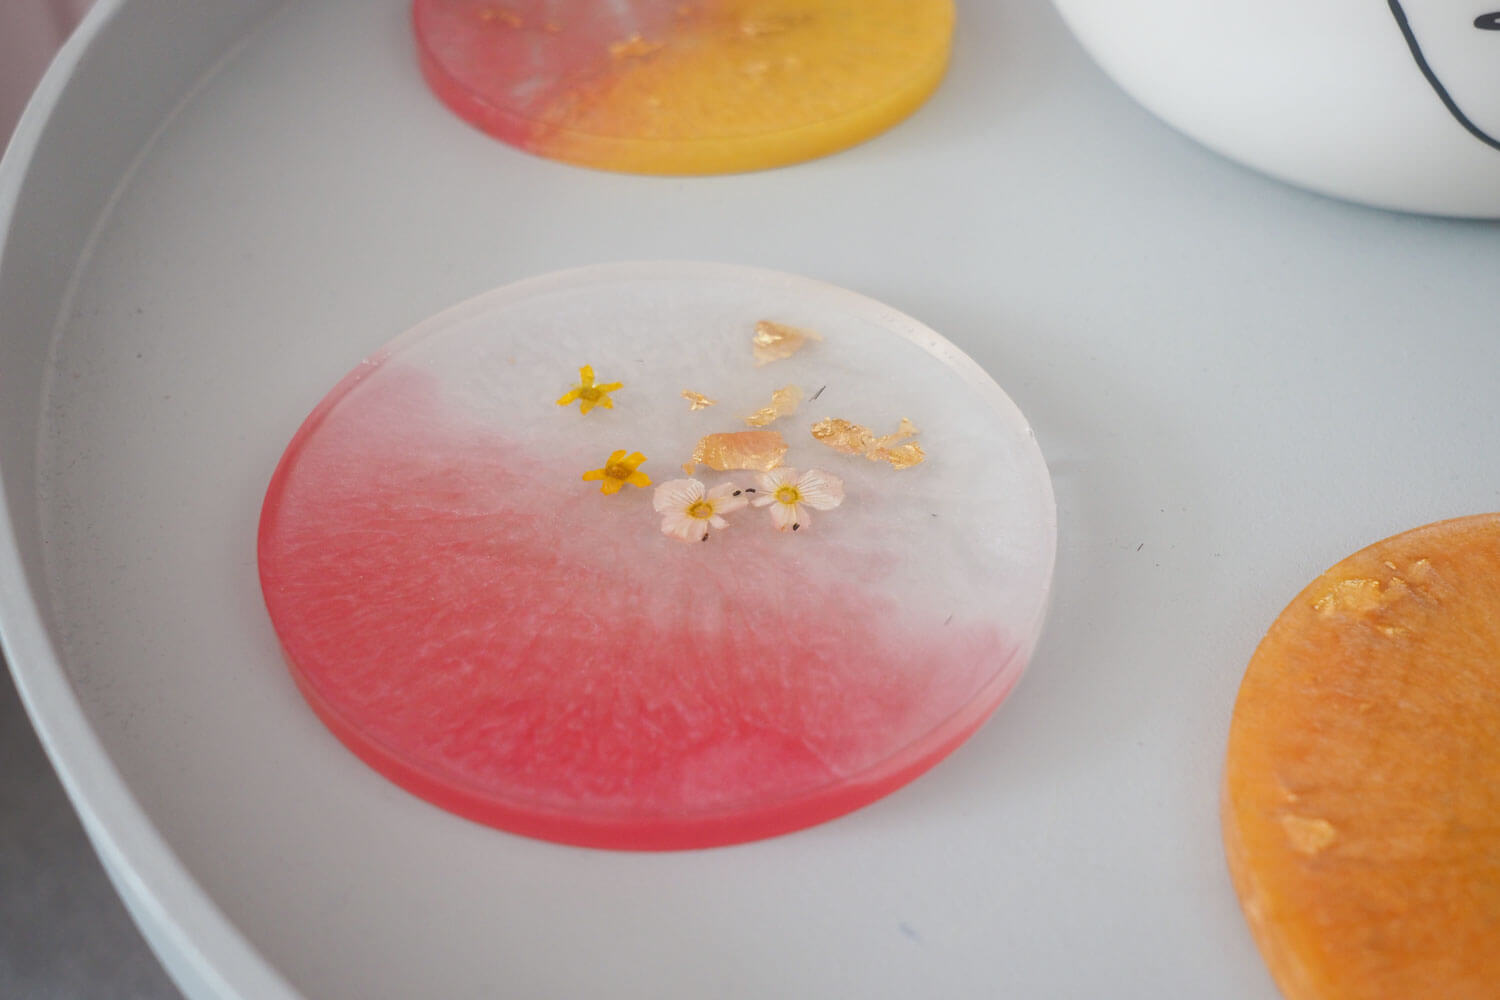

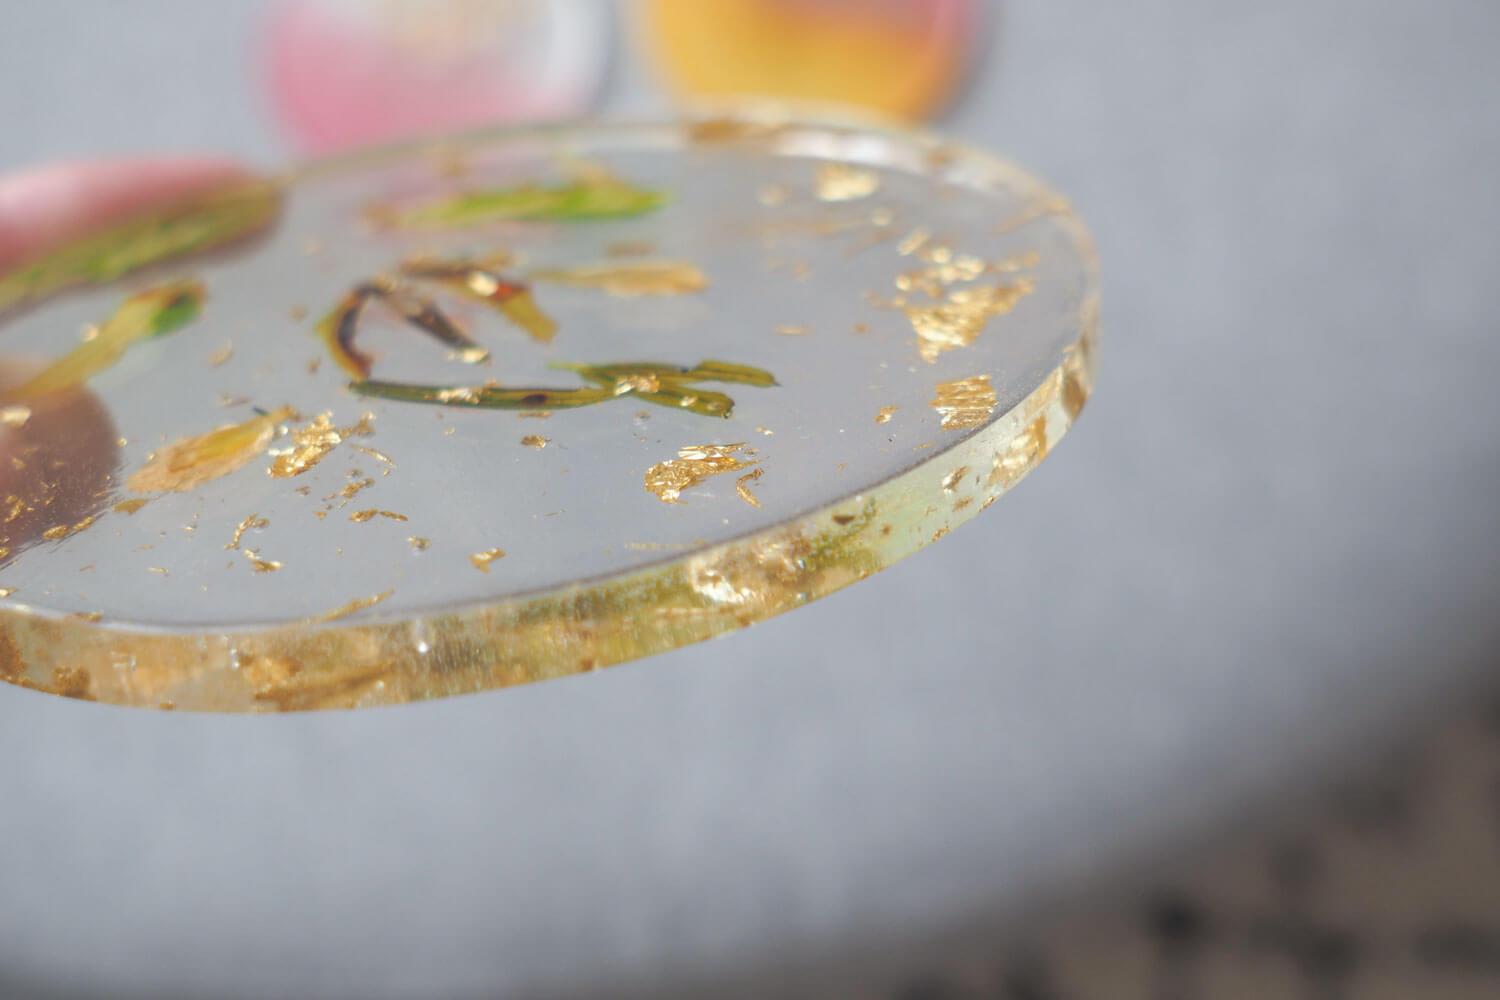
The most fun part of the Mouldd kit was combining different coloured resins and making patterns. It’s trial and error to get the right amount of mixture pouring at the same time, but it’s definitely the most satisfying part of the process and you can see how with practice, you can achieve some really cool designs. The gold leaf can look really effective but we did find it hard to handle and distribute as it stuck to our gloves, so I will definitely find a way that will work better next time.
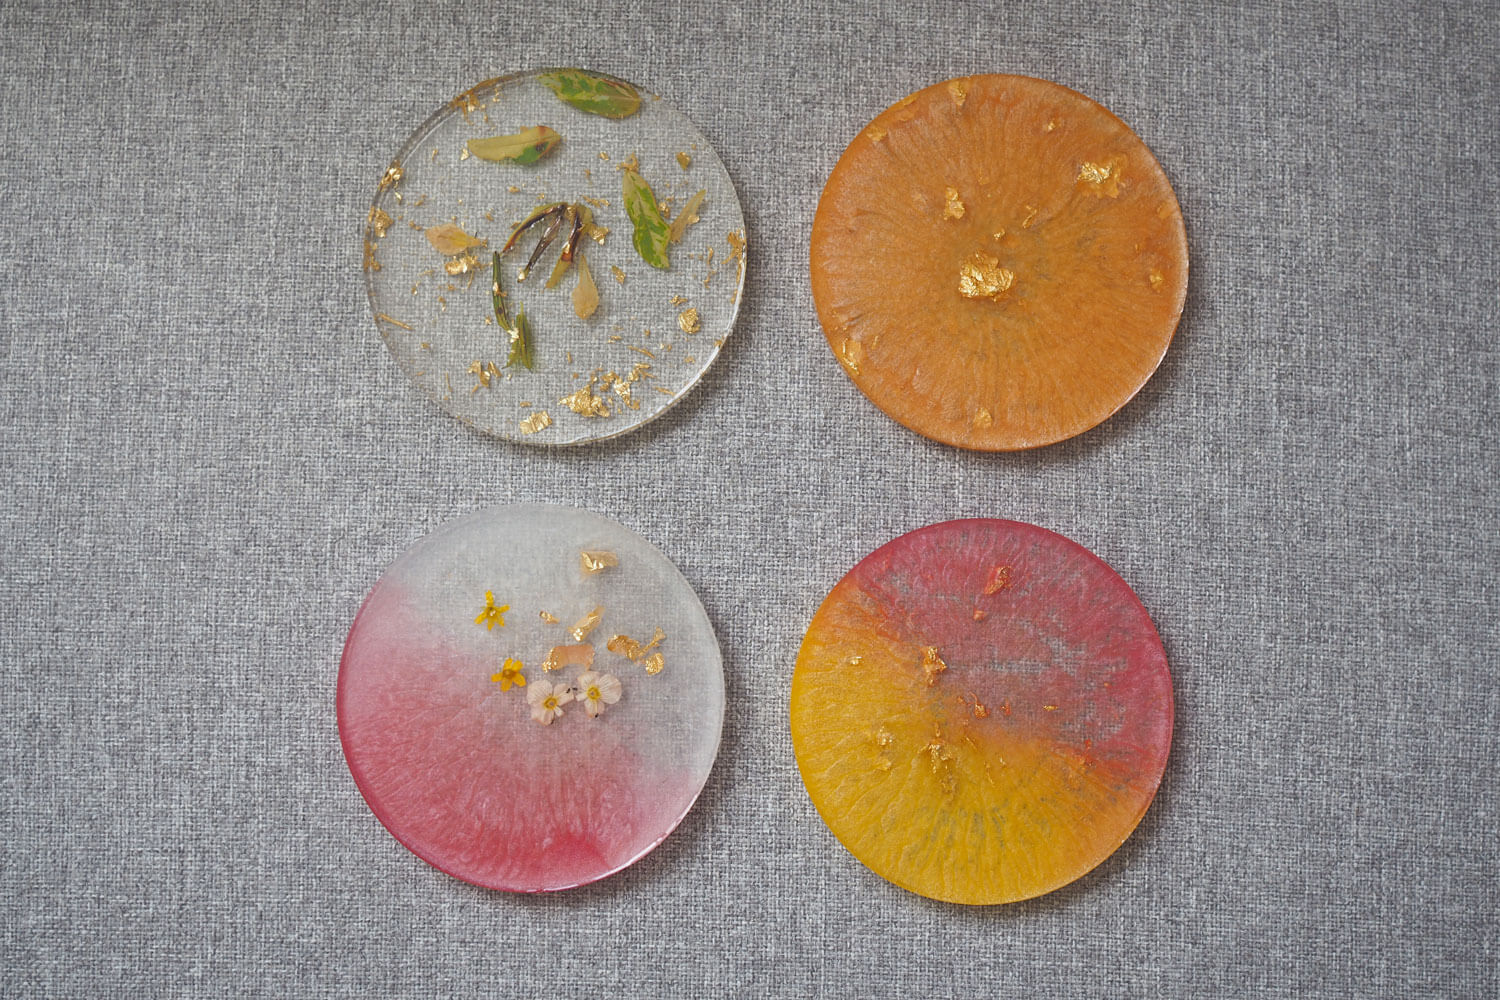
Overall we loved making the coasters and now we’ve got past the initial batch of finding out what works and what doesn’t, we can’t wait to give them another go – especially as we still have a fair bit of resin left to use.
Nb. I was kindly gifted the circle coaster starter kit for the purpose of this review, but all views and opinions remain my own.

Leave a Comment