
Chances are if you are looking at this, then you are interested in learning more about Pinterest Rich Pins.
If you follow the step by step by guide below, you will be able to utilise rich pins for your wordpress site. Don’t worry it’s a lot more straight forward than some people will lead you to believe!
First off the main benefit for enabling rich pins is they boost traffic, as you are able to add aditional information and more useful information to your pins.
There are 4 main types of rich pins, you can find out more here but to summarise:
App Pins – Show an install button so people can download your app without leaving Pinterest. For now, App Pins are only compatible with iOS.
Product Pins – These pins make shopping easier. They include real-time pricing, availability and where to buy your product.
Recipe Pins – Get cooks excited with all the right info: ingredients, cooking times and serving sizes.
Article Pins – These help Pinners save stories that matter to them. Each Article Pin shows a headline, author and story description… These type of rich pins are the ones most bloggers will use most frequently.
How do I set up rich pins for my wordpress site?
Step 1 – Download and install Yoast SEO Plugin or simply go to ‘add new’ plugin through your wordpress dashboard and install it there.

Step 2 – Once the Yoast plugin is installed go to SEO in the sidebar of your wordpress dashboard and click on where it says ‘dashboard’. bFrom here click on the ‘Features’ tab and click on ‘Enabled’ under where it says ‘Advanced settings page’ and then click save changes.

Step 3 – Now go back to ‘SEO’ in your wordpress sidebar and select ‘social’. Click on ‘accounts’ and enter all of your social links. Next click on the ‘Facebook’ tab and make sure that ‘Add Open Graph meta data’ is ‘Enabled’.

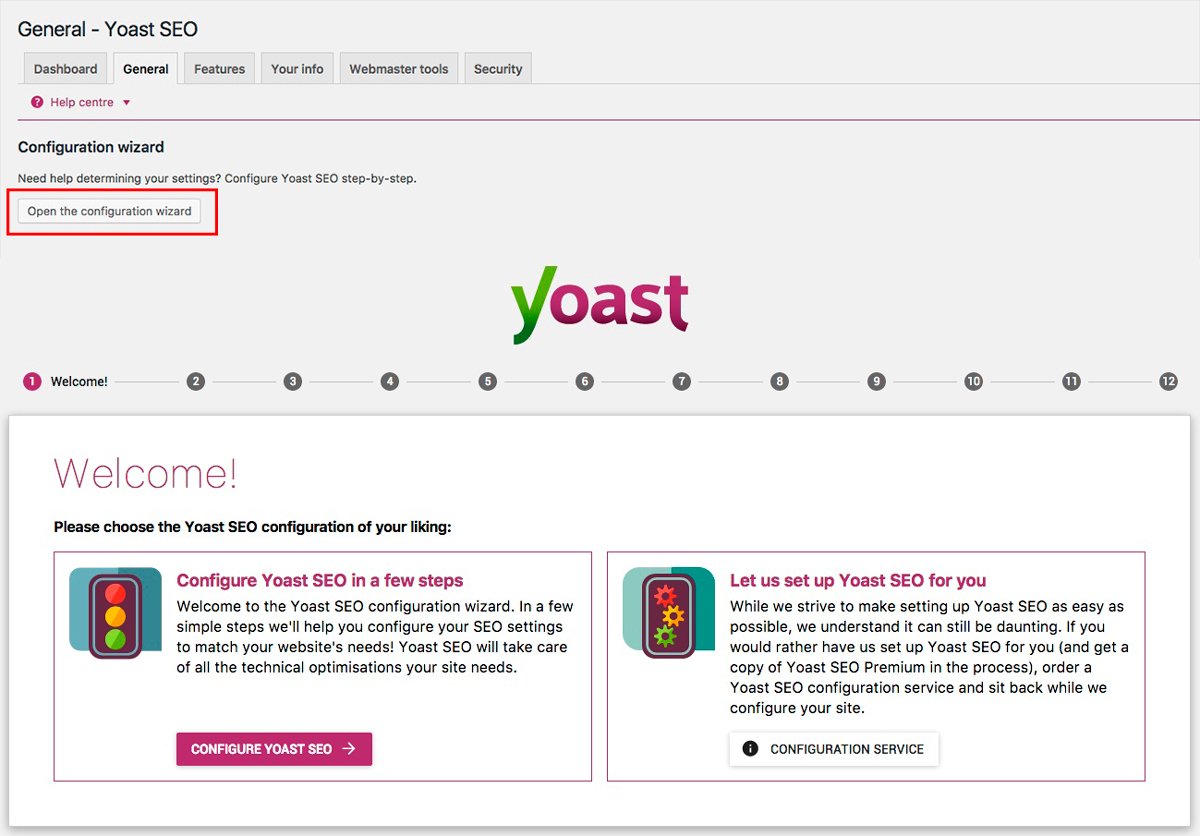
Step 4 – Go to ‘SEO’ in your wordpress sidebar and click ‘Dashboard’. Go to ‘General’ and then click ‘Open the configuration wizard’ once this new window opens, follow the instructions and enter all of the relevant information which is asked.
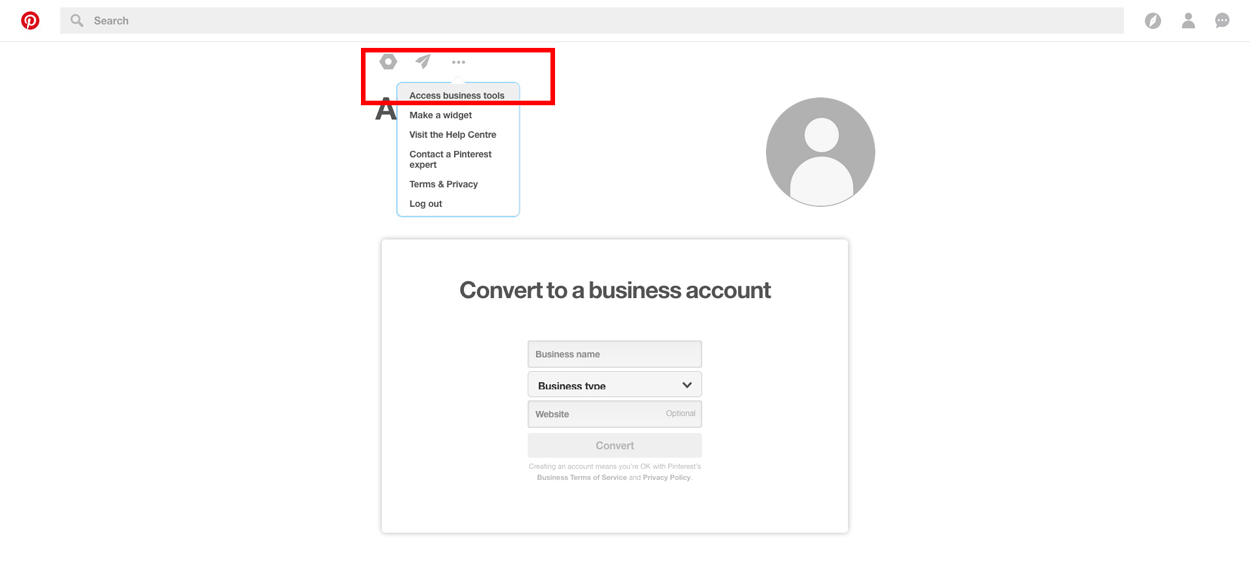
Step 5 – If your Pinterest account is still a personal one, the next step is to change it to a business account. To do that login to your profile, click the 3 dots at the top and select ‘Access business tool’. This will bring up where you need to fill out the info. For most people, under the drop down it will ‘Professional – e.g. photographer, blogger, designer)’. Once you have filled this out click the red convert box and your account will now be a business Pinterest account.
Step 6 – Now you have to confirm your website with pinterest, to do this you need to:
- Go back to your Pinterest account and select ‘settings’ under your profile.
- Next to where it says your website, click on ‘Confirm website’.
- Copy the code that appears in the box.
- Go back to the social section on your wordpress site, and under the ‘Pinterest’ tab, paste the code in to where it says ‘Pinterest confirmation’ and select save changes.
- Return back to Pinterest and select ‘Finish’.

Step 7 – Now all that’s left to do is to validate your wordpress site for Rich Pins. Go to this website (https://developers.pinterest.com/tools/url-debugger) and copy a link from your websitek. Paste the link into the empty box and click the ‘validate’ box.
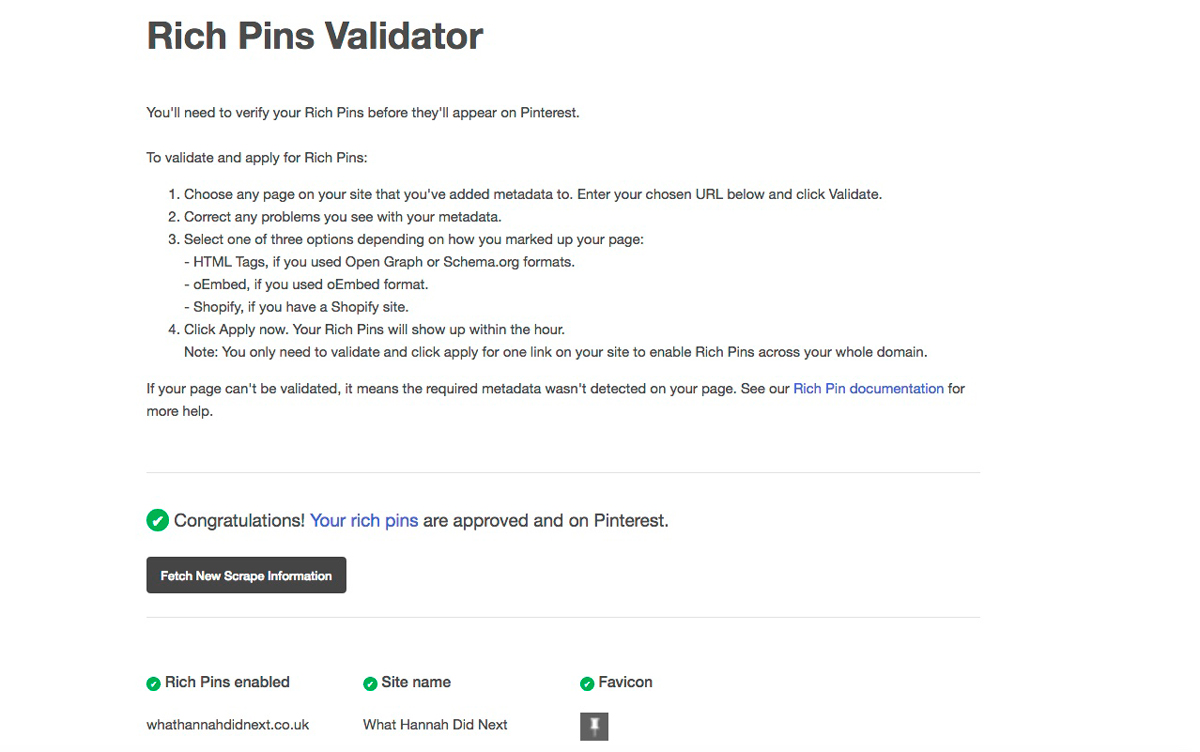
That’s it, you are now set up to start using Pinterest Rich Pins 🙂


Thanks for this tutorial, I’m going to have to give this a go. x
Really helpful post as I needed this explaining to me clearly.
I think there must be a problem on Pinterest’s end though as when i click to go and validate it won’t work”
I’m so pleased that it was helpful to you. Oh that’s strange about it not validating, I hope it’s now working for you?